We received an enquiry from a Faster Masters Newsletter reader.
I'm a Masters rower who has just been diagnosed with osteoporosis. The general advice is that rowing/strength training etc are good if done correctly but I wondered if you had any rowing-specific advice or guidance around this? I'm thinking about all the other things that we do around rowing (boat lifting/carrying in particular), as well as the relative risks of sweep rowing versus sculling. Do you know of any guidelines?
Thanks for any help or pointers you can provide.
Josh replied saying - this advice is very generic, I’m an orthopaedic surgeon.
First answer, it depends…
1. How was diagnosis made (i.e. proactive GP or after fracture)
2. How bad is the osteoporosis.
3. How old? Ie where on the curve of loss/maintenance.
4. Gender
Etc
But in general;
1. If their back’s ok, lifts and everything are fine.
2. Sculling is generally kinder on body, but just alternate sweep positions (port to starbourd) if you’re enjoying it.
3. Weight bearing exercises are key to bone maintenance and muscle mass, so add this to your program.
4. Good shoes on ramps etc to avoid falls
5. Use your club mates. Ask for help with lifts etc if people are around, it’s the fun part of clubs.
6. Talk to your specialist/GP.
7. Work on technique and boat setup to protect your back.
8. Talk to your team mates & coach, there will be others.
Very generalised I know, but hard to give specifics, osteoporosis has a wide spectrum of impacts.
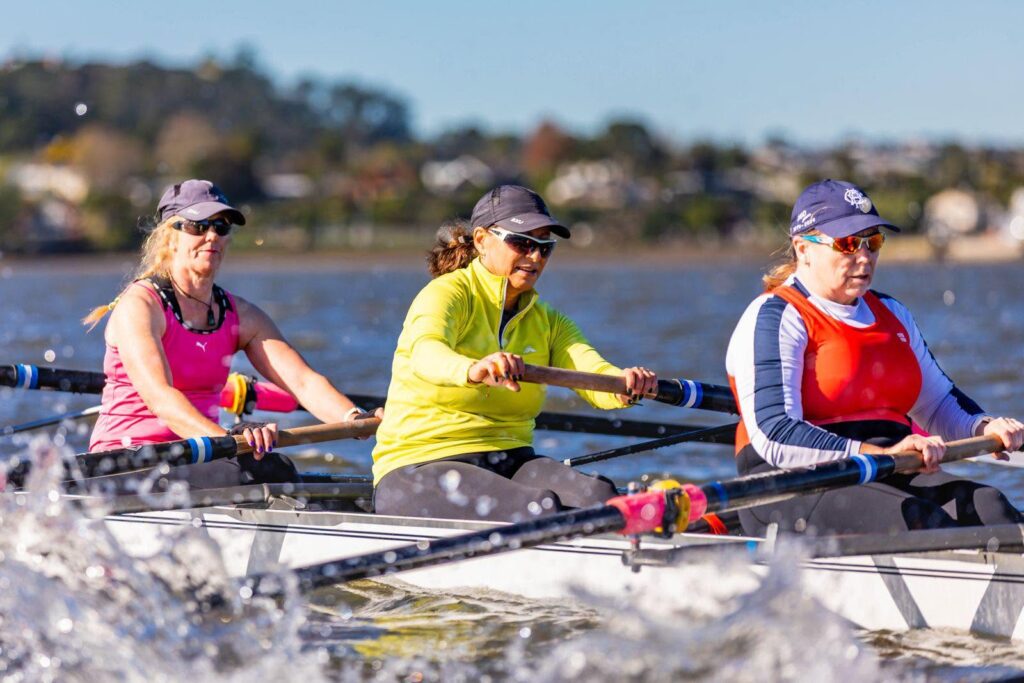
Follow one hand through one stroke in sweep rowing. Your outside hand is a second oarlock - controlling the handle when the blade is under the water.
Timestamps
Visualise your outside hand tracking through one stroke. It's setting the height for the oar. It goes through the longest arc. You get control for catch and finish timing from the outside hand, force on the face of the spoon and rhythm.
When the oar goes into the water, it doesn't move much during the power phase. But the boat is being levered past the oar tip. The pivot point from the end of the spoon is your handle and this is the 'second oarlock concept'. the outside hand times the catch placement and manages the oar depth.
Placement is proactive to make the handle move before your slide stops at the change of direction. Your outside hand moves a greater distance - moves further - than your seat moves. Placing with the inside hand won't give you the same finesse and control compared with the outside hand. This is because it's closer to the pivot point at the oarlock.
Your outside hand knuckles should point forwards towards your feet / the stern. This helps to keep your wrist flat. It also connects the handle through the kinetic chain to your feet.
Look at photos of rowers whose hands are not wrapped around the handle - they are likely using their inside hand to control the handle. The clue is their fingers extended and thumb dropping down not touching the handle.
From 90 degrees square off in the power phase your outside hand loses leverage and your inside hand takes over. Try not to let your elbow point out the side of the boat - let it go along your side ribs and point it to the person behind you.
From this point to the finish you can add power with your inside hand (pull hard).
This controls how the blade comes out of the water and sets the rhythm for the recovery. Use the movement of timing the extraction - sit still while extending the outside hand and arm only to take the oar out of the water and start moving to the stern on the recovery.
Speed of the handle into the body is approximately equal to speed out from the body.
Only move the shoulders after the arm is straight. This makes the rhythm for the recovery. On the recovery the blade shaft should be parallel to the water surface and approximately the same as all the other blades on your side of the boat.
Four jobs for your outside hand
How gripping tighter makes you slower.
In this episode you’ll discover why the tightest grip on the handle is often the slowest stroke, and what to do about it instead. The idea comes from Tai Chi, not the boathouse, but it applies directly to your hands, wrists and shoulders on the water. Here is the reframe. Softness is not the absence of power. It is how power actually travels through the body. Tension blocks it. Softness lets it flow. Soft hands, hard drive. Let's go.
Timestamps
You might think that if you grip harder, you'll row faster but if your thumb is tight, your whole hand is tight. Tension is like a virus - it spreads. A tight thumb leads to tight fingers, wrists, shoulders. Fear of losing your grip or catching a crab when under pressure makes you clamp down instinctively.
How should you hold a blade handle? Imagine you're holding a kitten or a puppy - or like it's a banana - if you squeeze too tight the skin splits and you have squashed banana on your hands.
When you have a tight hand or thumb it locks your wrist and forearm and travels up the kinetic chain of your body. Control and power are two different problems. A tight hand is just stiff and loses strength rapidly. Relaxing while keeping your fingers hooked around the handle gives you control and security.
When trying harder (like when rowing firm pressure) your instinct is to grip harder. This stiffens the kinetic chain and slows the transfer of power from your legs and body to the blade.
Soften your hand grip starting with your thumbs, then move to your fingers and you'll find this also loosens your forearm and try to row with a long neck (drop your shoulders).
A muscle which is already tight finds it harder to activate when you are calling for that muscle to work during the power phase of the stroke. A relaxed muscle is easier to engage and activate to move the boat.
Let your focus come down to the mass of your body and your leg drive doing the work rather than your hands being the driver of effort. Keeping your hands soft allows the mass/weight of your body to make the power.
A mental re-frame - soft hands, hard drive.
Softness isn't weakness it's how explosive power propels the water. Tai Chi says tightness is life running out of a stroke, softness is life flowing through it. Hand tension blocks power and gives you a slower catch, a slower grip on the water. Let this flow into soft shoulders which will enable you to get your body weight behind pushing the blade through the water.
How little energy you burn in one race - about one banana. The real skill is racing more than once in a day - what to eat and drink.
Timestamps
If you have more than one race in a single day you need to fuel appropriately. A single race barely touches your "fuel tank". The key is timing your meals and recovery between races.
A race is not a big calorie burn - about 150 - 200 calories for 1k. Your body stores thousands of calories of glycogen. When you put out a lot of effort you assume the intensity means you are burning a lot of fuel. Separate habit from what you need to fuel on race day.
If you race once in a day - fuel is not your limiter. Your hydration and glycogen are where they need to be if you've had a good meal the night before and on the morning of the regatta. Your job is to feel good on the day. You cannot empty your tank in one sprint race.
Racing more than once in a day the goal is about recovery in the gaps between your races. You have to replace fluid, nudge glycogen up a little but still keep your gut feeling comfortable.
After the first race don't eat a big meal - go small, frequent and easy to digest.
3 levers
Different people find this different - practice and notice what happens to you on race day. Time when you ate and how you feel at the second race. How your tummy feels may affect your nerves and affect digestion rates. Never trial a new food on race day - it's not worth the risk.
I'm not replacing calories, I'm staying ready. - Know you're not depleted removes the panic eating - Fuel for one race by how you feel - Fuel for many races by planning the gaps between races.
Use a race day plan / timetable - add fueling into the timetable and checklist. Here's an article which may help you.
The cause and cure for feeling low in energy during racing. A 5k race burns only about 350 calories.
Timestamps
Most rowers think they've run out of energy half way through a race. Most races aren't energy-depletion events (porridge is 350 calories; banana is 95 calories). You likely aren't running out of fuel.
The feeling of distress in sprint racing comes in two places - about 40 seconds after the start and again just after the midway point. It feels like exhaustion but your body uses the same "alarm signal" for multiple problems. Believing you're out of energy gives you mental permission to slow down. But you haven't yet earned the right to slow down.
Lactate - that burn feeling is your body accumulating lactate faster than your body can clear it. It's a signal that you are working really hard. Not that you're out of energy. Pacing and mental focus can help you get beyond that feeling of pain. Rebecca and her doubles partner adjusted their race plan to give a focus at the point the pain kicked in.
Do not back off on your rate and pressure. That instinct is probably wrong. You have fuel - you have to let lactate clearance catch up with output. A fractional reduction in output can allow lactate clearance to get ahead.
Practice the 1% drop in pressure in training. Push for 10 strokes - power strokes; then do another 10 strokes dropping the pressure 1% and keeping the rate the same; then do a third 10 strokes back onto full pressure. It's a tiny step down and then a deliberate step up. You can repeat this set of 30 again if you need.
The mental reframing is necessary as well. Tell yourself "this is lactate" and I have got fuel to continue. Once you know what it feels like you can choose your response.
Weight on the feet is one of the three key concepts for rowing and sculling mastery. How it's a key transition point in the stroke cycle and the giant advantages for crews who can all get there at the same time.
Timestamps
This can be hard to understand how to do weight on the feet. After learning how to do this you will learn slide control (stop rushing) and how to move your body in time with the hull of the boat. Learn how to slow down the boat speed less on the recovery - your speed is the net of power phase acceleration and recovery phase deceleration.
Sit on a hard chair and take your two forefingers and put them under yourself and find the "sit bones" which is the ischial tuberosity. It will crush your fingers a bit. While your fingers are there, rock forwards and back with a straight spine. If you are using your pelvis to rock you'll feel the sit bones moving over your fingers. Note if you curve your spine and don't rock from the pelvis, the sit bones do not move over your fingers.
Stand up from your chair (sit on the very front of the seat to to this). As you stand up you will rock your shoulders forwards and feel pressure through your socks and shoes onto the floor. In order to push through your feet in rowing you have to get your body mass rocked forward and your hips pivoted.
Get your hands and arms straight and your body rocked forward then bend your knees a little and you will feel pressure on the soles of your feet. This is "weight on the feet". The leaning forwards is an important part of the sequence because it's hard to get weight on the feet when leaning backwards.
Get the feeling of weight on the feet by clenching your glute muscles. At the finish, tighten your glutes which helps you to locate your sit bones on the seat, then straighten your arms and when they cannot straighten any more - the shoulders rock forwards to naturally follow and your legs bend till you feel you can push on your feet. This may be at one quarter slide or half slide - it depends on your flexibility.
You HAVE to get your shoulders forward, if you do not do this you will find it harder to locate pressure on your feet. The glute engagement connects your back and legs like a door hinge. Soggy glute muscles means you don't get the connection or the transition of body weight forward successfully.
When you have your feet pressed into the foot stretcher, it's an important transition point in the rowing and sculling stroke.
Weight on the feet is the moment when you move from tension to deep relaxation in the stroke cycle. You stay relaxed until the oar goes into the water at the catch. With this looseness you have very deep muscle relaxation in your legs and calves and you can remove all tension from your body (while maintaining poise in your posture). Elite rowers work hard because they give themselves extreme relaxation and "turn off" muscles when they are not needed - this means they don't get tired so quickly.
At weight on the feet your oars should be off the water in a high balance position (shafts horizontal to the water surface), and you're controlling the blades with your hands. The control of the oars and your body means you are able to relax your body and prepare early for the next catch.
Weight on the feet is one of the 4 key concepts we teach in our Sculling Intensive course.
The advantages for crews is explained in "From Frustration to Flow" using the four quarters method taught by Richard Parr - learn how to do this quarter in his masterclass webinar.
Once you can handle weight on the feet you can do three things
Repeating workouts to improve your skill at doing them - how to sharpen into the piece, count down, ways to swap with bow four. How not to waste strokes and ways to start on the right stroke rate. Execution quality is a performance variable in its own right.
Timestamps
What do you think is happening when you do a workout? Execution skill improves with repetition. There are repeating workouts in any training program - this builds fitness and your ability to do that practice. The second time you do a workout, you know what it feels like, how to make your effort work consistently across the whole piece. This is performance-relevant knowledge. Poor execution comes from wasted strokes at the start of the piece, being at the wrong stroke rate, the wrong pressure, taking 5 strokes to get to the specified stroke rate. This affects your pacing (too hard or too light) and also changeovers (steps up in rate for example). Your physiological adaptation needs to be as good as it possibly can be. Over a season there is a compounding effect of successful physiological response to training stimulus.
Get into the work and don't waste your approach. For a 20 stroke firm / 10 light piece. All the 20 firm need to be at the right stroke rate and intensity. Use the last few light pressure strokes to build pressure and rate. By counting down into the work piece so each stroke builds to the stroke #1 rate and pressure. Have in your mind the target stroke rate - what does SR 24 feel like? Build your familiarity without needing a stroke coach to count rating.
First add pressure before adding rate. Rate without pressure leaves you "spinning" especially at rates over 24. Call "Going up in 3 -2 1 - GO" or "Going up, on the next stroke [wait one stroke] now".
Our cox calls "Build pressure now'; two strokes pass then 'Rate up now'.
At rates below 25 it's easy to hit the rate just using increased pressure - it is harder at rates from 26 and above to get the rate - you have to be more deliberate building the pressure then the rate. Start a change like that at the correct place in the stroke cycle.
Make these changes at the catch. The pressure change starts at the catch; stroke rate changes begin at the catch. To do this effectively, athletes must know they are making a change half a stroke cycle in advance of the change. Call the change at the FINISH. This gives them advance warning of the change.
There are changes which happen at the finish like stepping down in stroke rate or a rhythm call and these must be called at the catch. Be half a stroke ahead of time if you give the calls. Listen to when the cox or the caller made the call to change.
Your goal for the workout is to execute more and more successfully.
Three fixes for your indoor rowing technique faults.
Timestamps
Interrupt the fault before it becomes a habit. Foot connection gets lost at the finish as your toes come away from the footstretcher. When you lose connection you aren't moving the boat forwards, same on the erg because the feet are the only connection to the boat.
Take a $10 bank note and put it under the toes of the athlete - if they lose foot connection at the end of the drive, the money falls to the ground. Have a bet with your athlete - they can keep the money if it's still under their toes. The whole of the sole of your foot needs to stay pushing on the footstretcher at the finish. Try it separately for both feet.
Avoid over-compressing at the catch with knees going over your toes. Take a bungee cord or some electrical tape and wrap it around the rail so the seat wheel butts up to it at the correct catch position. The athlete will feel the wheels rolling over the tape - it acts as a gentle physical reminder to stop at the catch position. Check your catch position first using a mirror or a photo - get your shins vertical. Do some steady rowing to learn where your new compression limit is.
If you tend to pause at the catch, try this. On the erg the rail slopes downwards towards the footstretcher. Lift up the front leg of the rowing machine by 10-15 cms. Use a crate, an aerobics step or a big book. The incline means it's harder to rush forwards. Note if your catch alters when you change direction with the front leg raised. Gravity will tend to make you want to roll backwards away from the flywheel.
Most rowing clubs were designed around the racing calendar. And for a long time, that was fine. You joined young, you raced hard, you aged into masters. The structure made sense because life cooperated: school sport rolled into club sport, and the 4pm training session was nobody's problem.
That world is gone. And too many clubs are still running the 1980s membership model while wondering why retention is soft and the waiting list for adult rowing never quite materialises.
Here is what is actually happening at the waterfront, and what clubs could do about it.
Most clubs operate some version of the same three-tier structure:
The junior/senior racing programme targets younger athletes aiming at competitive 2000m events. It demands serious time commitment, typically four or more sessions a week, and is priced accordingly at roughly double a standard masters subscription. Sessions are structured around school and after-school hours, with early afternoon starts on weekdays.
The masters programme serves the 27-and-over crowd, offering flexible scheduling and a subscription at roughly half the cost of the racing tier. It is, by most accounts, the more sustainable and community-driven part of the club.
Learn to Row sits across both, priced at around the same level as the masters annual subscription, and offers a six-week entry point for beginners.
On paper this looks comprehensive. In practice there are three structural gaps that clubs are systematically failing to fill.
1. The Time-Poor Young Adult
She is 21, she works three days a week, and she wants to learn to row. She is not a schoolkid -- the 4pm weekday session does not exist for her. She is not yet eligible for the masters programme. She has looked at the website, found nothing that fits, and moved on to another sport.
This is not a niche case. The 18-to-26 cohort is precisely the age group most likely to be exploring new activities, most likely to stick with something that becomes a social habit, and most likely to become long-term club members. Losing them at the door because of a scheduling mismatch is an own goal.
2. The Recreational Non-Racer
He is 19 and he saw the rowing on television and thought it looked good. He would like to get on the water a couple of times a week for fitness and company. He has absolutely no interest in training ten sessions a week toward a 2000m race.
For him, the current structure offers one choice: the high-performance track at double the cost, with all the commitment that implies. He declines. The club loses a member who might have stayed for a decade.
Most sports have figured out how to separate competitive and recreational participation. Rowing clubs, by and large, have not.
3. The Lapsed Rower
She rowed at school. She knows how to hold a blade. She has moved to a new city, joined a gym, but would love to get back on the water occasionally without signing up for a full competitive season, paying full racing-tier fees, or re-sitting a beginner course she does not need.
There is no product for her. So she stays at the gym.
Clubs often treat the idea of hiring a paid coach as a luxury. The numbers suggest otherwise.
A modest Learn to Row programme, running two six-week courses per year, reaches financial sustainability well below capacity. If coaching costs are modelled against LTR revenue at a mid-range uptake of 15 participants per year, the coaching bill covers itself before recreational membership growth is even factored in.
Add in the retention benefit of paying members who can shift between a competitive and a social track as their life circumstances change, and the maths improve further. The alternative is losing members entirely when life gets busy, which means losing the subscription entirely.
The good news is that this does not require clubs to merge, restructure their governance, or abandon what makes them distinctive.
What it requires is decoupling commitment level from age. The current model assumes that age determines how seriously you want to row. It does not. A 22-year-old might want the recreational track. A 45-year-old might want to race. The tier should follow the athlete's goals, not their birth year.
Practically, this means:
There are implementation questions worth working through: health and safety induction for casual members, how equipment access and booking is managed, whether a paid coach coordinates the recreational group or whether it runs on a peer-led model. None of these are insurmountable, and most clubs will find they have partial solutions already in place.
Rowing is a sport with extraordinary retention potential. People who row tend to keep rowing, often for the rest of their lives. The physiological demands suit older athletes. The social dimension is strong. The masters pathway is, for many clubs, the healthiest and most engaged part of the membership.
But you have to get people in the door first. And right now, a significant slice of the market in the form of the young professional, the recreational adult, and the returning rower is hitting the club website, finding nothing that fits their life, and quietly going elsewhere.
Is your club's membership structure built for the rowers you have, or for the rowers who actually exist in your community?
That is the question worth putting to your committee this season.
Three cheap and simple hacks to help your sculling. Small clever fixes to real problems that scullers deal with all the time. One for your head, your wrists and your blade depth.
Timestamps
Sculling technique faults are very subtle and you can't always feel them from inside the boat. These three hacks move that feedback from external to the boat (from your coach) to inside (you can feel changes yourself and can act on them).
If you move your head during the stroke, this is the hack for you. Ideally you want your head to be in line with your spine during the stroke and to stay in line when you swing your body back/forwards. The head is heavy - 15 lbs or 7 kg. Wear a cap with a stiff brim so that you can see the horizon from under the cap brim.
The horizon is always horizontal - pick a single point to watch (a tree, a house, the back of the head of the person in front). Keep an eye on the horizon point while you row - this will give you clues about how your head moves.
When feathering in sculling you want to use your fingers and not your wrist. Take a piece of tape from your forearm across your wrist towards your knuckles - masking tape / electrical tape / micropore are all suitable. If you move your wrist it will pull on your arm hairs and serve as a reminder. As a rule of thumb tape 20 minutes before you start rowing - this gives time for the adhesive to bond with your skin.
A hack for those whose oar spoons go too shallow, too deep or corrugate through the stroke. Tape the oar so that when the oar is sitting in the water at the correct depth, you can just see white tape on the oar shaft.
How to position the tape - sit in the boat with it level and put the oar, squared, into the water carefully so you don't get the shaft wet. Let go of the handles and the blade will naturally sit at the correct depth. The blade will tend to sit 1 cm above the water surface (this gets covered up when you are rowing as you push a mound of water in front of the spoon). Track where the shaft gets wet and that's where you put the white tape. Measure the distance from the spoon insertion point and you can then put tape on other oars at the same place.
As you row, the white tape is then above the water surface while you are rowing - adjust your handle height so that the tape stays visible.
Join our community and get our exclusive Faster Masters Rowing Magazine, packed with tips, techniques, and inspiring stories. Includes four new articles monthly.