Why the blade pathway from crossover to catch is so different between the left and right hands. If you aren't going straight, three things to check.
01:00 What generally causes difficulties?
Beginner errors are straightforward to work out if these are affecting you.
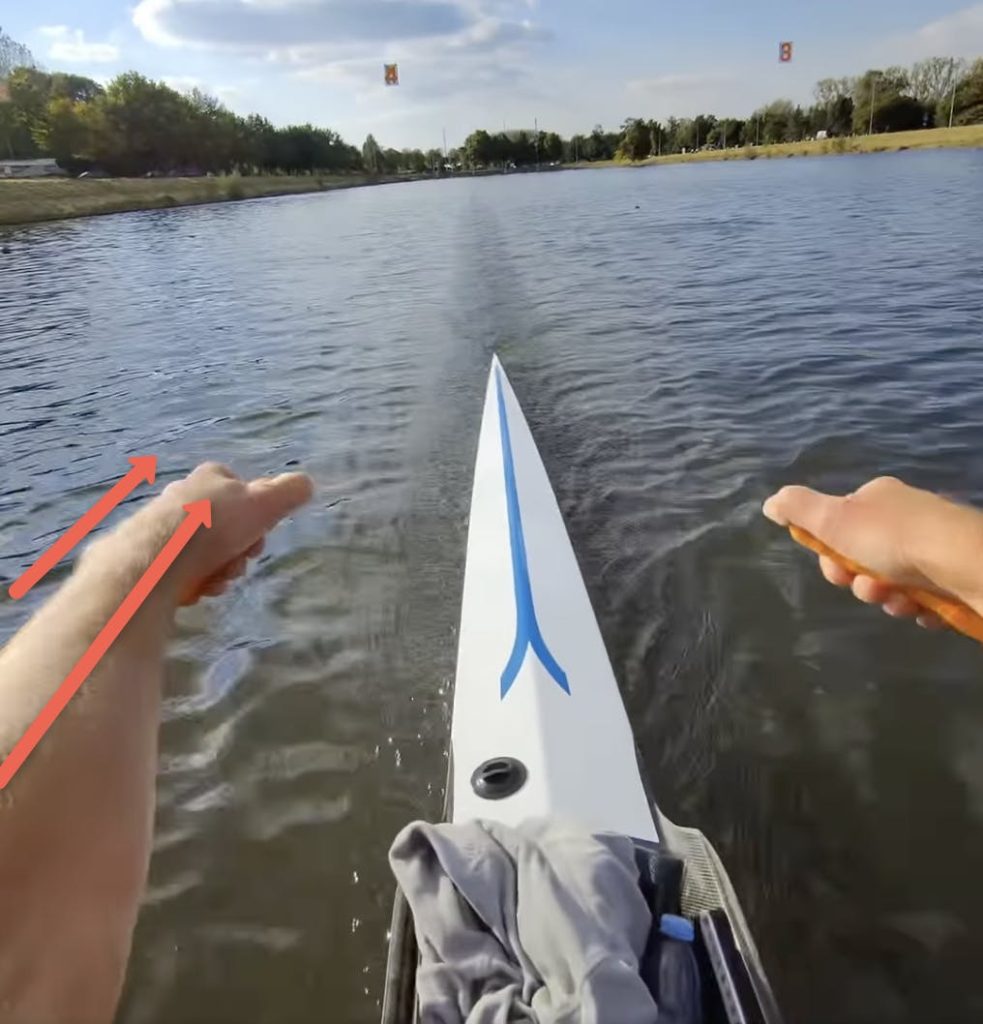
Look from your stern to the horizon and line up your stern with a fixed point (house, power pole, tree) and watch the wake off your stern. You can see if the vee of the wake is symmetrical.
04:30 Blade extraction - are the blades coming out at the same time and are you pressing down symmetrically? If one blade drags that affects the boat course.
05:30 Blade crossover - from extraction to handle crossover it's important the boat is level. The rig is left higher than the right - your handle heights have to reflect the difference in oarlock height. Ensure your hands are "nested" close together.
08:00 Blade catch - the handles have to be symmetrical around a similar arc from the oarlock so the tips of the blades are the same distance from the side of the boat.
The right hand has to move a greater distance from crossover to the catch than the left hand. It's probably 2 cm greater distance. Practice the fine motor skills to make subtle adjustments to the handles using pontoon floats on a single scull. Your arms have to go out to the same distance at the catch (not the same handle height). Listen to the sound of the oars going into the water - you can hear if one oar goes in before the other.
Want easy live streams like this? Instant broadcasts to Facebook, YouTube, LinkedIn. Faster Masters uses StreamYard: https://streamyard.com/pal/d/5694205242376192
Inspired by an extensive discussion on the Masters Rowing International Facebook group, this article summarises the issue and the advice shared by group members.
If you’ve been sculling for a while, you might have experienced the painful frustration of scraped or “bloody” knuckles. It’s quite common, but it’s not one you have to live with. By making a few key adjustments to your technique, you can keep your hands intact and enjoy smoother, more efficient rowing.
In this post, we’ll explore why scraped knuckles happen and how to prevent them. Whether you’re an intermediate master rower looking to refine your sculling or simply want to row pain-free, these tips give you some things to try.
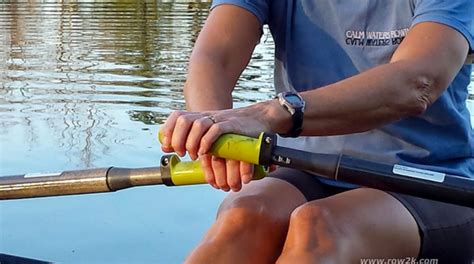
The root cause of scraped knuckles lies in how your hands and the oar handles interact during the rowing stroke, both on the recovery and in the power phase. As you bring the handles toward your body, they overlap at the crossover point. This is the place where the fingernails of one hand can pull over the skin of your other hand.
When sculling, you can choose a couple of different techniques to reduce the likelihood of hazard at the overlap. My favoured technique is to scull with the left hand above and slightly in front of the right hand, so the knuckles of your right hand "nest" into the base of your palm of the left hand - the fleshy part at the bottom of your thumb. This "left-over-right" technique applies throughout the stroke but is most obvious when you handles go through cross-over.
This method is facilitated by the boat rig whereby the left oarlock is rigged 10mm (1 centimeter) higher than the right oarlock. It relies on you being able to scull with the left hand / arm always above the right hand / arm, throughout the stroke, from catch to finish.
In this still taken from a video, you can see the sculler's left hand is higher than his right hand at the catch. He continues the stroke with the left always higher than the right through to the finish. If I'm being picky, he sculls the power phase left in front of right and the recovery phase with hands stacked one above the other. But this is a minor point of refinement. His boat runs level and he has not got obvious scratches on his knuckles!
Alternative techniques include sculling with one hand directly above the other, sculling with a large vertical gap between your hands at the crossover.
Other contributing factors include:
Scraped knuckles are an annoyance, but they’re also a badge of honour - mostly only scullers get them, not sweep rowers!
By focusing on hand staggering, grip relaxation, and elbow movement, you can row more comfortably and efficiently. As a mid-life master rower, these adjustments not only prevent knuckle scarring but also enhance your overall enjoyment of the sport.
Take the time to refine your technique, and your knuckles will thank you!
Support this show with a donation
https://fastermastersrowing.com/register/podcast-supporter/
03:00 This past week - Learn to row classes; Peer to Peer Coaching Clinics and new masters at Knowlton Rowing Club
08:00 Gardening and rowing - over use injuries.
12:00 Troubleshooting body sequencing. Video first so you know what you're doing
13:00 The recovery - know the sequence you want. Arms - body - slide.
Feeling unstable when putting the blades in the water.
Setting the body angle - twice or once?
Moving up the slide "like an accordion"
17:00 The power phase - the sequence is legs - back - arms.
Only use each body part once per stroke.
Drills to emphasise the sequence - Legs only rowing; legs and backs; legs back and arms. Then blend them together.
24:00 Legs only drill. Blades on the water reinforces the horizontal power - level handles.
Mark the blade shaft 40 cms up from where the blade joins the shaft. Use white tape and use this as a marker to ensure the blade isn't too deep.
29:00 Blade depth while stationary - check it.
The slope of the oars to the water matters and is affected by boat depth in the water.
40:00 Finish at the xiphoid process - demonstrates the oarlocks are set at the correct height.
Rowers need to have strong fingers to control the oars. Our expert coaches, Marlene and Rebecca, explain
We got this question
Could you recommend some exercises to improve finger and forearm strength? My fingers and forearms often tire from trying to feather correctly without using my wrists,
First it pays to check you have got the basics correct in your equipment and the technique you use to turn the oar (feathering and squaring).

19:00 If you have osteoarthritis - don't push yourself into inflammation and swelling with your rowing practice. Don't use your thumb to apply internal pressure on the oarlock either if you have osteoarthritis.
20:00 How tight should you hold the handles? As if you're holding a kitten, puppy or a small bird - Firmly enough so the animal doesn't struggle, not so tight that you crush it..
23:00 If your forearms wake you up at night feeling restless. You should stretch them.
Do the "Karate Chop" drill on the recovery and Open Palm Sculling drill.
26:00 Trigger finger syndrome can be developed from rowing. The anular ligaments get pulled and swelling happens in the tendons.
28:00 How to train for both speed and endurance simultaneously. If you are doing CRASH-Bs erg race in March and enter the 30 minute and the 500m sprint event.
Follow the Faster Masters Rowing training plan first and foremost - pick the 1k racing plan. If you have extra time include a 40 minute low intensity row or aerobic cross training session.
32:30 Keep the group together - over the holidays stay in touch with your crew mates and become accountability partners. Community matters in masters rowing.
Join our community and get our exclusive Faster Masters Rowing Magazine, packed with tips, techniques, and inspiring stories. Includes four new articles monthly.