Learn steps towards getting a good catch using drills.
Timestamps
00:45 Am I done learning the stroke yet? Asked an athlete.... only once!
The catch is challenging to learn - supporting your learning with drills means you can self-coach as well as getting coached.
Michael sends his crews the drills video the night before practice. Athletes need to know what to do in a drill and (importantly) why they are doing this drill. There are two main types of drill - exaggeration drills and isolation drills.
This is where learning the catch starts - the height of the handle has to be understood so you know how high/low the handle needs to be. Describe the stroke cycle in high/low handle heights including the "ramp up" towards the catch position. Learn this stationary in the boat. When the oars are flat on the water at the catch, the handle height is the same as when the oars are squared. Teaching how to arrive at this height the drill is "Slap Catches" so the athlete knows the precise moment their handle reaches the correct catch height - and the aural sound helps to align timing on both sides of the boat. Learn when to go up "the ramp".
You have to actively lift your hands to make the catch 'shape' with the handle. Learning when and how to do this is the next stage in progressive learning. After squaring the blade, if you make the catch shape too early, the oar hits the water.
If you square and your handle is too high on the recovery the oar will hit the water. An early square helps and you can figure out how high (low) the handle needs to be on the recovery so as to not hit the water. When to make the shape? Use the second drill - backsplash drill - so the lower edge of the oar hits the water just as the handle lifts. You can hear and feel the backsplash.
This is relative to your body movement and the seat. Your seat is a good proxy for body movement because there's a short moment when the seat rolls forward and stops as it changes direction. That's when you need the oar to already be under the water. The third drill (sweep) is to row with inside hand holding the back of the seat so you can tell when it changes direction. In sculling row with one oar only (someone holds the boat level). Watch the height of your knees too as this is also a good visual marker.
Our discussion continued around ways to keep handle moving towards the stern while placing the oar at the catch. This series can be learned in a few practice - do two each time you go on the water. Take care that you understand the why as well as the how.
Want easy live streams like this? Instant broadcasts to Facebook, YouTube, LinkedIn. Faster Masters uses StreamYard: https://streamyard.com/pal/d/5694205242376192
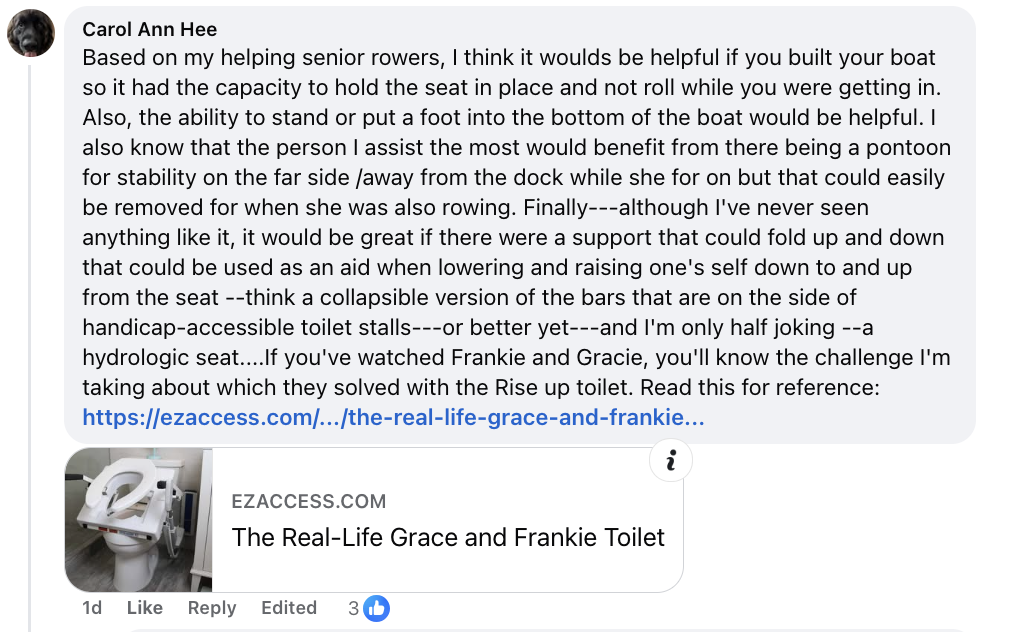
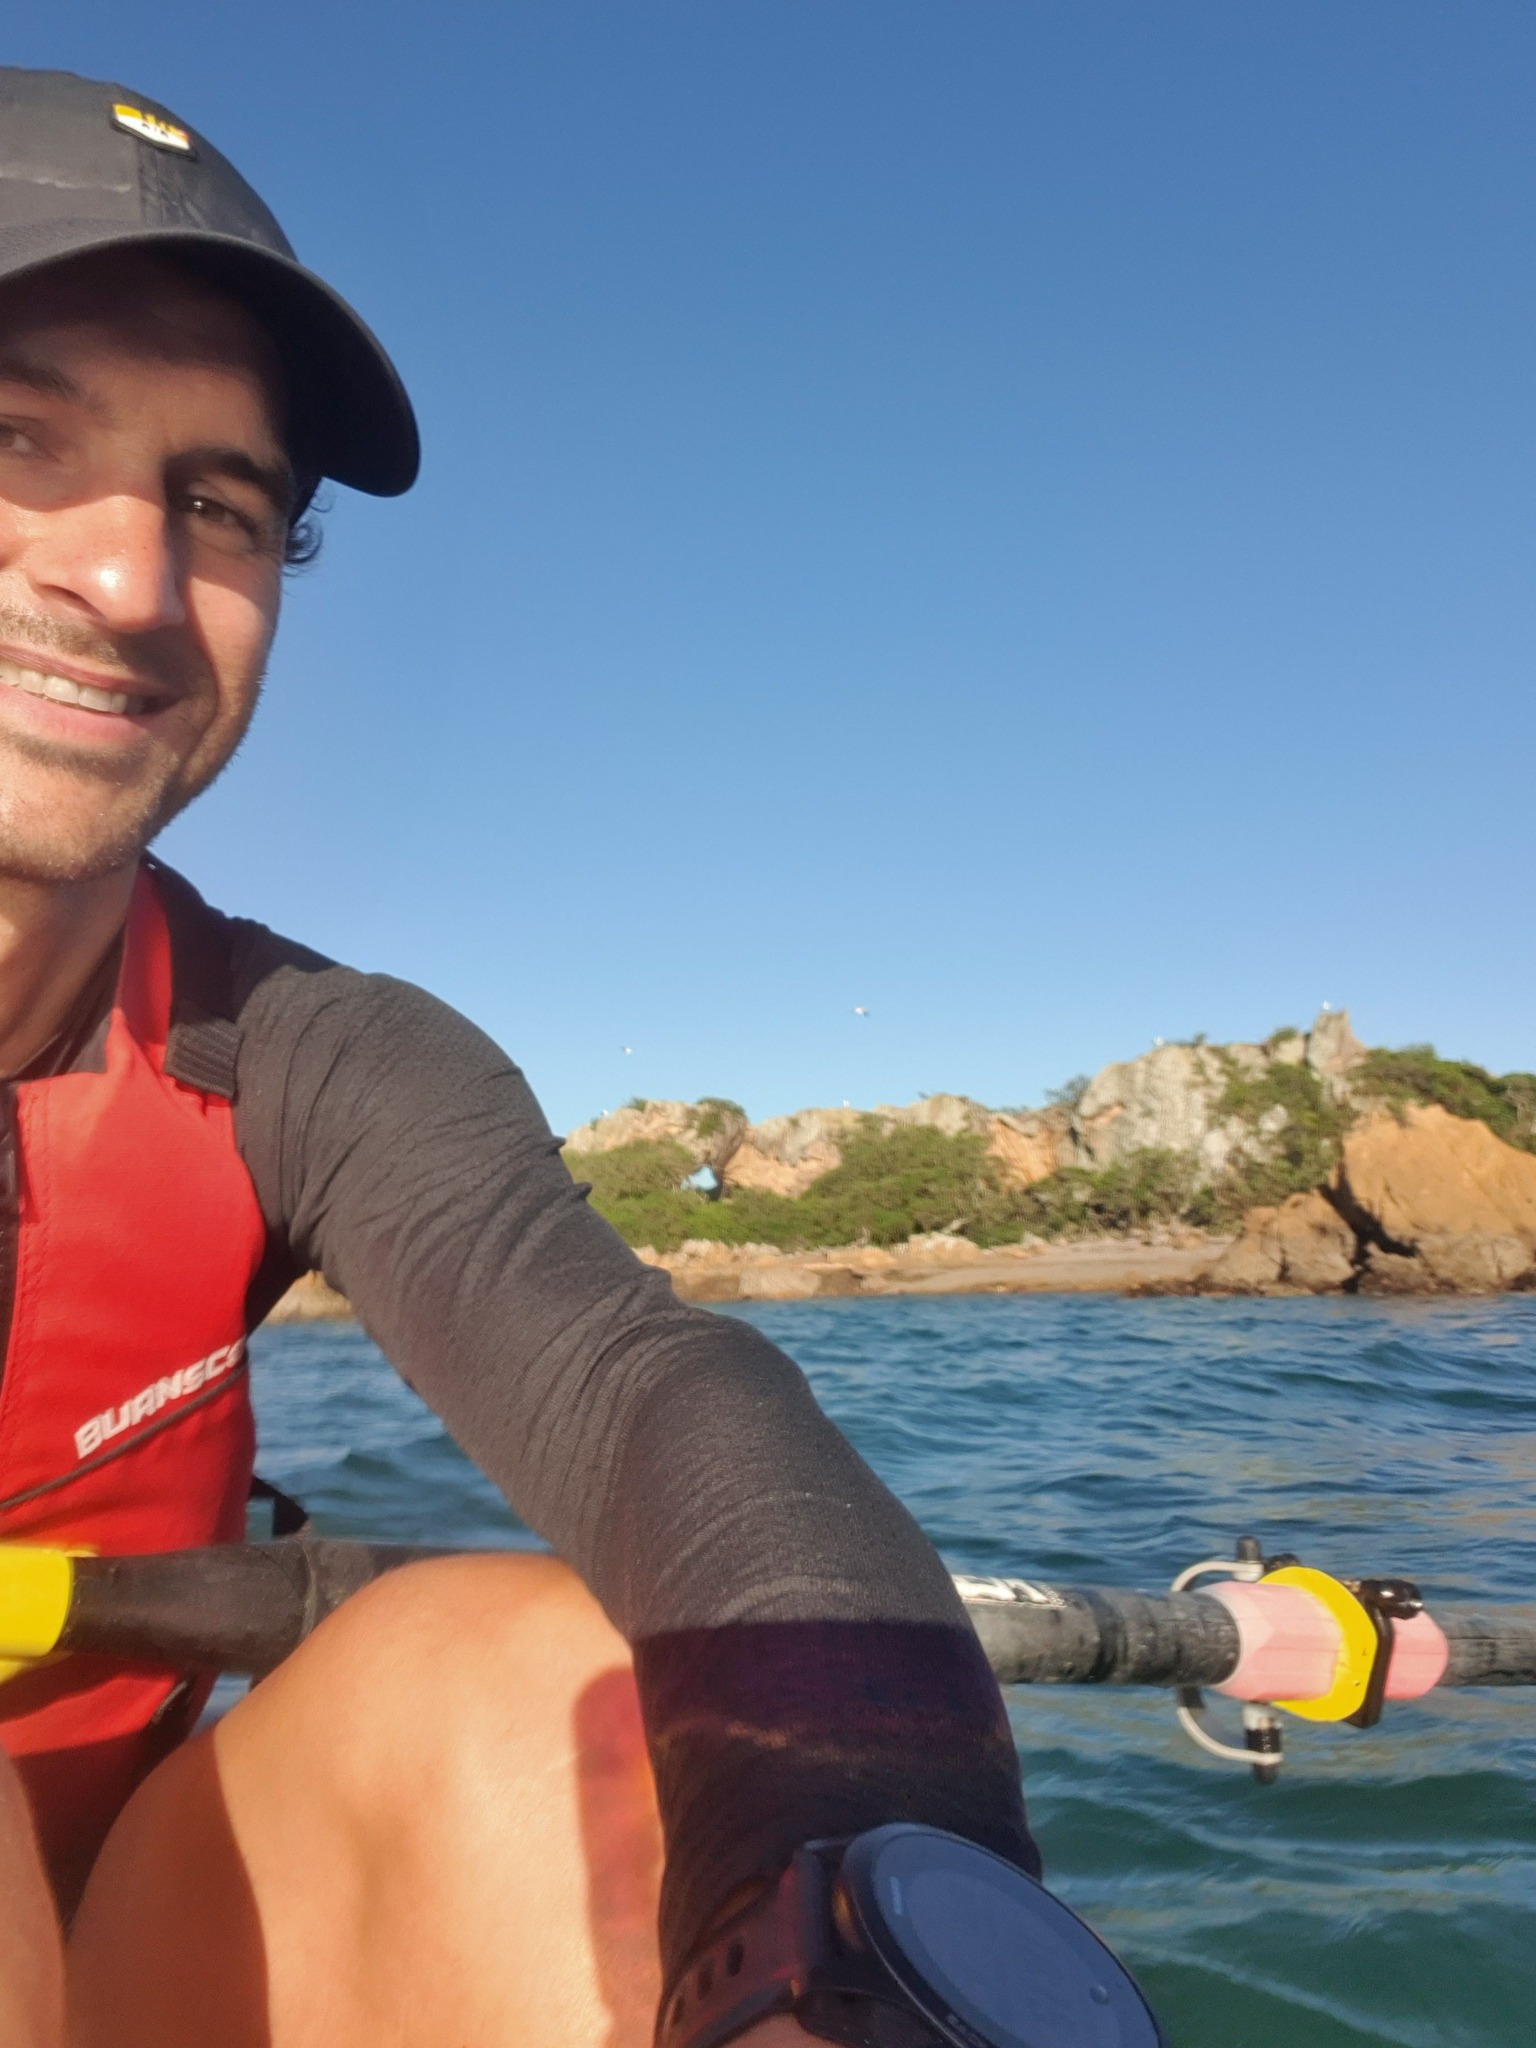
What attributes does a Masters boat have as accommodations for increased age? Van here, in Massachusetts US.Masters Rower.
For the last 15 or so years I have been rowing in a Graeme King designed single I built in 2007..
I added a Rowfit wing rigger, in consultation with the designer, to replace the side mount rigger that the boat was designed for.
It has been a great boat and I have rowed it every year at least 70 times a year in all sorts of venues. I have even raced it a few times although I never did very well, I am not a fast rower and I was carrying 40 extra pounds until a few years ago. I have attached a photo of "Boanne" (the Celtic goddess of rivers and poets)
But last year, rowing with other people which I rarely do, no judgement please, I was on a strange river and got caught in a whirlpool below a bridge abutment and I capsized into cold water. It was a bad situation but I survived the hypothermia thanks to the kindness of strangers. However the incident left me rattled and in fact fearful.
I was forced to look hard at the whole activity of rowing and how I approached it. I am back now rowing to my usual schedule of 3 or 4 times a week now. But I can't feel the total lack of fear that I had known for many years. So I am rethinking the whole thing.
I am 72 but I absolutely am not going to stop doing what I love and what is such a critical part of my self image.
However I am only going to row in really good to excellent conditions, being retired and only working part time now gives me the freedom to do that.
I love my boat but it is getting on but I think it may be time to build the "last boat". I have rowed boats I have built for myself for the last 30 years, all wood and carbon. I have no interest in rowing a factory built boat, I respect those boats but I don't want one.
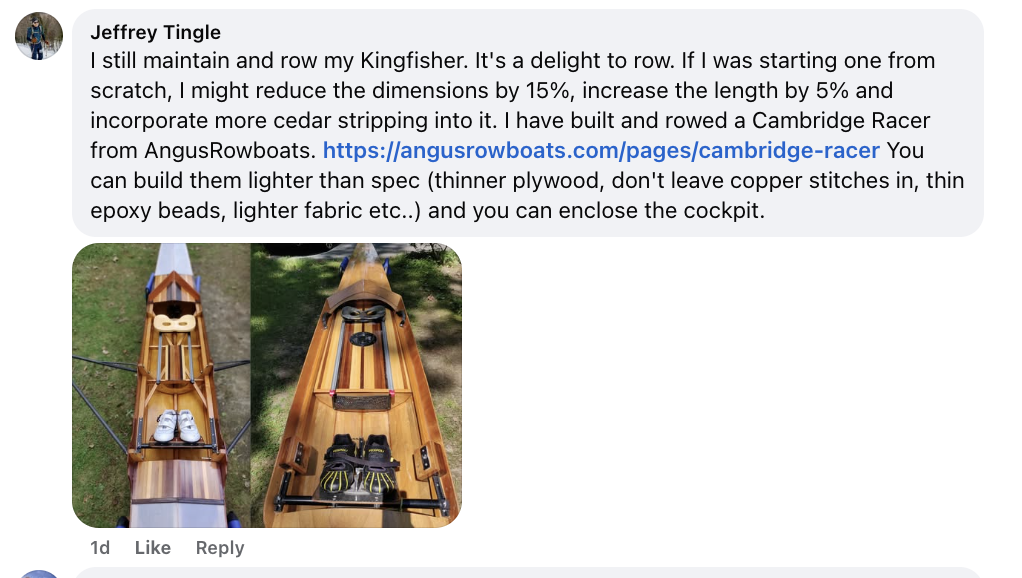
I recognise that I want a boat with more initial stability and I keep thinking back on my old Kingfisher that I built and rowed in the late 90s. However that boat is based on more traditional sculling designs and I would like a more modern boat.
This is a long way to get to my question for the Masters rower community.
"What attributes does a Masters boat have as accommodations for increased age?" Production boats are useful for comparison but I am not going to buy one.
Incidentally I have been communicating with King about this project and we both agree that the KIngfisher design is the logical starting place. If you don't know that boat you can look it up in the "Wooden Boat" magazine archives.
I built and rowed one back in the late '90's, I regretted selling it, the most comfortable boat I was ever in. But it was an old fashioned style boat with soft decks and open seat deck. It also had a hard chine because it was initially designed to be built with 3mm plywood. I would make some changes to a hard deck and enclosed cockpit. I would keep the hard chine and width simply for the increased security and comfort, this is not a boat I will ever race.
Thanks for all you do, Van.

There was a lot of advice and recommendations - I've listed below the boat designs mentioned.
And some of the comments, to read the full post you have to join the group [please answer the membership questions - these help us to filter out spammers].
The principal design changes discussed include
3 weather data points you need to know in advance whether you can row the next day.
Timestamps
Mostly we want to know in advance and apps are useful. What should you be looking out for? Easy choices are - will it be sunny or raining? However the really important data is wind speed and wind direction for the time you plan on going rowing. Also consider air temperature / water temperature plus tide if you row on a tidal waterway.
WindFinder and WindGuru both track wind (designed for sailing). They layer information such as a map graph animated to show wind movements over time.
Wind Direction: Where I row if the wind is coming from the East and is above 10 knots speed we can get on the water. This direction blows straight onto our pontoon. Finding the wind shadow on our lake can enable us to row when winds are higher.
Wind Speed: The limits for us are about 12 knots for big boats, less for singles and doubles/pairs. The WindFinder app shows gusting wind speeds as well as the base wind speed. This enables us to interpret the data in a more nuanced way. Knowing the time of high and low tide is helpful too (for our other boathouse location) because low tide means navigation is more congested and hazardous.
This is a Norwegian app - using the same base data points but their own unique algorithm to forecast ahead. Where I live the weather can often move through quicker than forecast. This app is much more accurate than the others and it also gives hourly updates rather than 3 hour increments.
Finally- when you thin the weather is going to be marginal, we found that deciding whether to row when you're at the rowing club is better than trying to decide the night before. Decide In The Shed; Not In Bed is our mantra.
Want easy live streams like this? Instant broadcasts to Facebook, YouTube, LinkedIn. Faster Masters uses StreamYard: https://streamyard.com/pal/d/5694205242376192
Many coaches started doing rowing video analysis markup with a tool called Coaches Eye - sadly it was withdrawn September 2022 and so we have all been on the hunt for a replacement.
We have found some for you to consider.
This is free on the Apple Store. You can import your videos into it, run at slow speeds down to 1/8 speed, annotate, measure angles etc. Also offers In-App purchases for distributing video to athletes.
You can upload two videos side-by-side and compare them.
This is a tool which does physiological measurements for you - it scans your video of rowers and tells you angles between the limbs and the stroke length and sequencing. The process is called "telestration".
Clearly useful for tracking progress as your crews adapt to a particular style of rowing. Downsides, it's THEIR analysis, not yours and it is only numbers. The coach needs to first have a good idea of what numbers they want. The app is free at the moment as it's in beta.
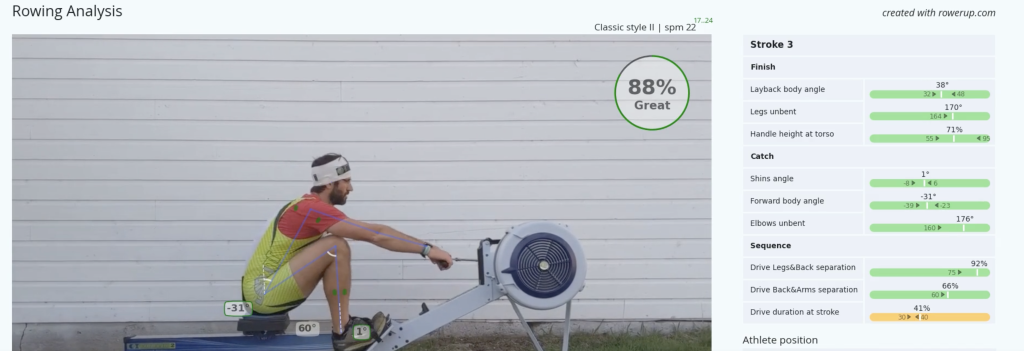
This is the closest alternative to Coaches Eye - annotate your video with lines, angles and comments. It also offers semi-automated angle tracking (like Rowerup). Most usefully it allows side by side comparison of two videos which you can synch e.g. to the catch of one stroke.
The app is free and the creator asks for optional Patreon subscription support.
This is an app and designed to offer simple annotation and most usefully "skeleton mapping" - a stick man drawing tool. So you can automatically see where the rower's limbs are and how they move. That saves a lot of time drawing lines! It has slow motion replay, and side by side options and also allows text messaging to your athletes from inside the app.
The coach version is only available in the Apple app Store for iPad users. The Athlete version is in the Google Play store as well. The coach version includes in-app purchases.
This article was first published in the Masters Rowing Magazine in May 2023.
How to make swapping easier, the differences, visible signs of what goes wrong and drills to help you swap sides and codes.
Timestamps
Masters frequently get asked to swap - first couple of times you are clumsy and have lost fine motor skills. Differences are about oar handling, movements up and down the boat and round the rigger.
Get videoed or ask the person sitting behind you to tell you what they can see.
Practice these in the warmup.
Want easy live streams like this? Instant broadcasts to Facebook, YouTube, LinkedIn. Faster Masters uses StreamYard: https://streamyard.com/pal/d/5694205242376192
By Bruce Ware, President PWRC and member of the Coach Mastermind Group.
The Prince WIlliam Rowing Club's season is off and running; a small subset of the Club is prepping for our first 1K sprint regatta - I am entered to row a 2x with my wife, and we're the oldest boat in the group with the biggest handicap!
In my role as President of the Club, I've been trying to incorporate some of the great ideas that have come up in our discussions on this Coach Mastermind web-chat. Yes, Rebecca sets up a main topic for the session, but when I join in, there's always something else I need to talk about, to get advice about, and maybe even just to vent some frustration.
The other participants bounce ideas on how to handle some of the usual challenges each of us faces as masters rowers and coaches of masters, and I make frequent use of those suggestions.
"People join in because they know how broad and multi-faceted our discussions become. And what can I do to boost those numbers, to get more people to join the discussions?"
Like I said, the topics are multi-faceted and change every session. For example, I know that one of the best ways to recruit and strengthen a masters rowing club's numbers is to market the club as a "fitness for life" approach that can meet the health and fitness needs of many differently-abled people. One corollary method is to offer a "pay-to-row" option, where people can come out to row as their work-schedules and other commitments allow.
My Club has not offered this option, but we are starting to see some requests coming in asking for this sort of arrangement. With a Club of nearly 100 members that has a mixed mission of "high-performance" racing, recreational and "social" rowing, and a large learn-to-row novice component, I have to recognize that I cannot just open the floodgates to "pay-to-row" without impacting our coaches' ability to set line-ups, especially the racing squad coaches.
My treasurer says "no way! too much of a headache!" I know my racing squads and their coaches would object, so I have to exclude them. And LTR novices have claimed a "seat" in a boat that someone else who we had to leave on the "waiting list" (club resources and assets being limited, we had to cap our LTR novice group at 32 for this year) could have purchased and used.
How do I allocate financial resources to a Club equitably? The LTR novices don't need anything special, as they already have boats and a full coaching staff. The intermediate "recreational/social" squad only occasionally has some small teams that want to compete in a regatta, but they don't require a lot of extra resources. The sculling squad is small - 7 or 8 of us, we have our one coach and plenty of shells to use - a 4x, 3 or 4 2xs, and a half-dozen 1xs - so our major additional expense would be for entering and traveling to regattas, and those are not frequent events.
So, the racing squads, which make up only about 30% of the Club's numbers, routinely claim over 70% of the Club's funds. Is that fair that a large percentage of the members' dues is used to "subsidize" that rowing activities of a minority?
These sensitive topics are the kind of things we talk about on Coach Mastermind!
You should be there {{ subscriber.first_name }} because you might have encountered these sorts of situations in your own clubs, and could offer suggestions on how to handle it. I coach juniors and high school kids, not masters. I've offered to coach masters, but don't want to give up my own rowing!
But running a masters club means I need to rely heavily on masters coaches, and this is one of the best places I can come and get that kind of help.
Please, when Rebecca posts next month's session, make the effort to join us.
Coachability is a key skill for masters. Because you can change your technique after getting instruction.
A coach wrote to me this week asking for advice. This is what they said.
The most frustrating aspect I find is the athletes who you spend time coaching that change during the outing but then revert the moment your back is turned. I've tried diagrams, analogies, drills, even crying!
I'm sure you aren't THAT athlete. Look from the coach's perspective. What is it that prevents us from making progress when we are getting coached?
Oooh, love this one. Tom Terhaar once said I was the most coachable athlete he’s ever worked with. I don’t take credit for this: mostly, it’s innate proprioception that I was born with. But, if I had to name what I consciously do, it would be:
It’s a bit more difficult to understand in an adult, but I suppose it still boils down to the reasons why someone is rowing: I’m not saying that receptiveness to coaching is solely or universally an issue among L2R masters, but
I wonder if understanding what different people want to get out of the sport might give coaches an insight into what will make them more receptive to technical guidance.
Different needs for different levels of experience. This goes without saying, because within any one masters group (whether beginners or elite racers) I find vastly differing back-histories. We have top racers who have never lifted weights and beginners who have a lot of experience.
This article sets out some of the goals for core strength based on the athlete's expertise in the weights / strength gym. It's not based on their rowing experience.
Focus: Activation and endurance rather than brute strength.
Exercises:
Focus: Stability under movement and fatigue resistance.
Exercises:
Focus: Maintaining stability under high force and dynamic conditions.
Exercises:
Why Train Core in the Boat?
While rowing itself is a core workout, supplementing it with land-based core training (planks, Russian twists, anti-rotation exercises) will give you even better results.
When working with less experienced athletes, I explain core stability in the boat as two things. Holding your "tummy firm" and "clenching your glutes as if you're holding in a fart". This always gets a laugh and it's a surprisingly effective way to show them which muscles they need to control.
1. Pause Drills for Stability:
2. Slow Ratings and Controlled Movements:
3. Single-Leg Rowing for Core Activation:
4. Side-to-Side Balance Drills:
5. Half-Slide Rowing for Core Control:
6. Sculling for More Core Engagement:
In-boat drills for core - get them to tighten their tummy muscles at pause points. Then rolling forward, get them to tighten glutes (describe this as holding in a fart) as they approach the change of slide direction at the catch.
Yes, you can train your core effectively while rowing, as the sport itself naturally engages core muscles. However, to specifically target core strength and stability, you can incorporate focused drills and techniques into your on-water sessions.
We offer a monthly strength training program which can be introduced at any time of year. It includes core strengthening exercises.
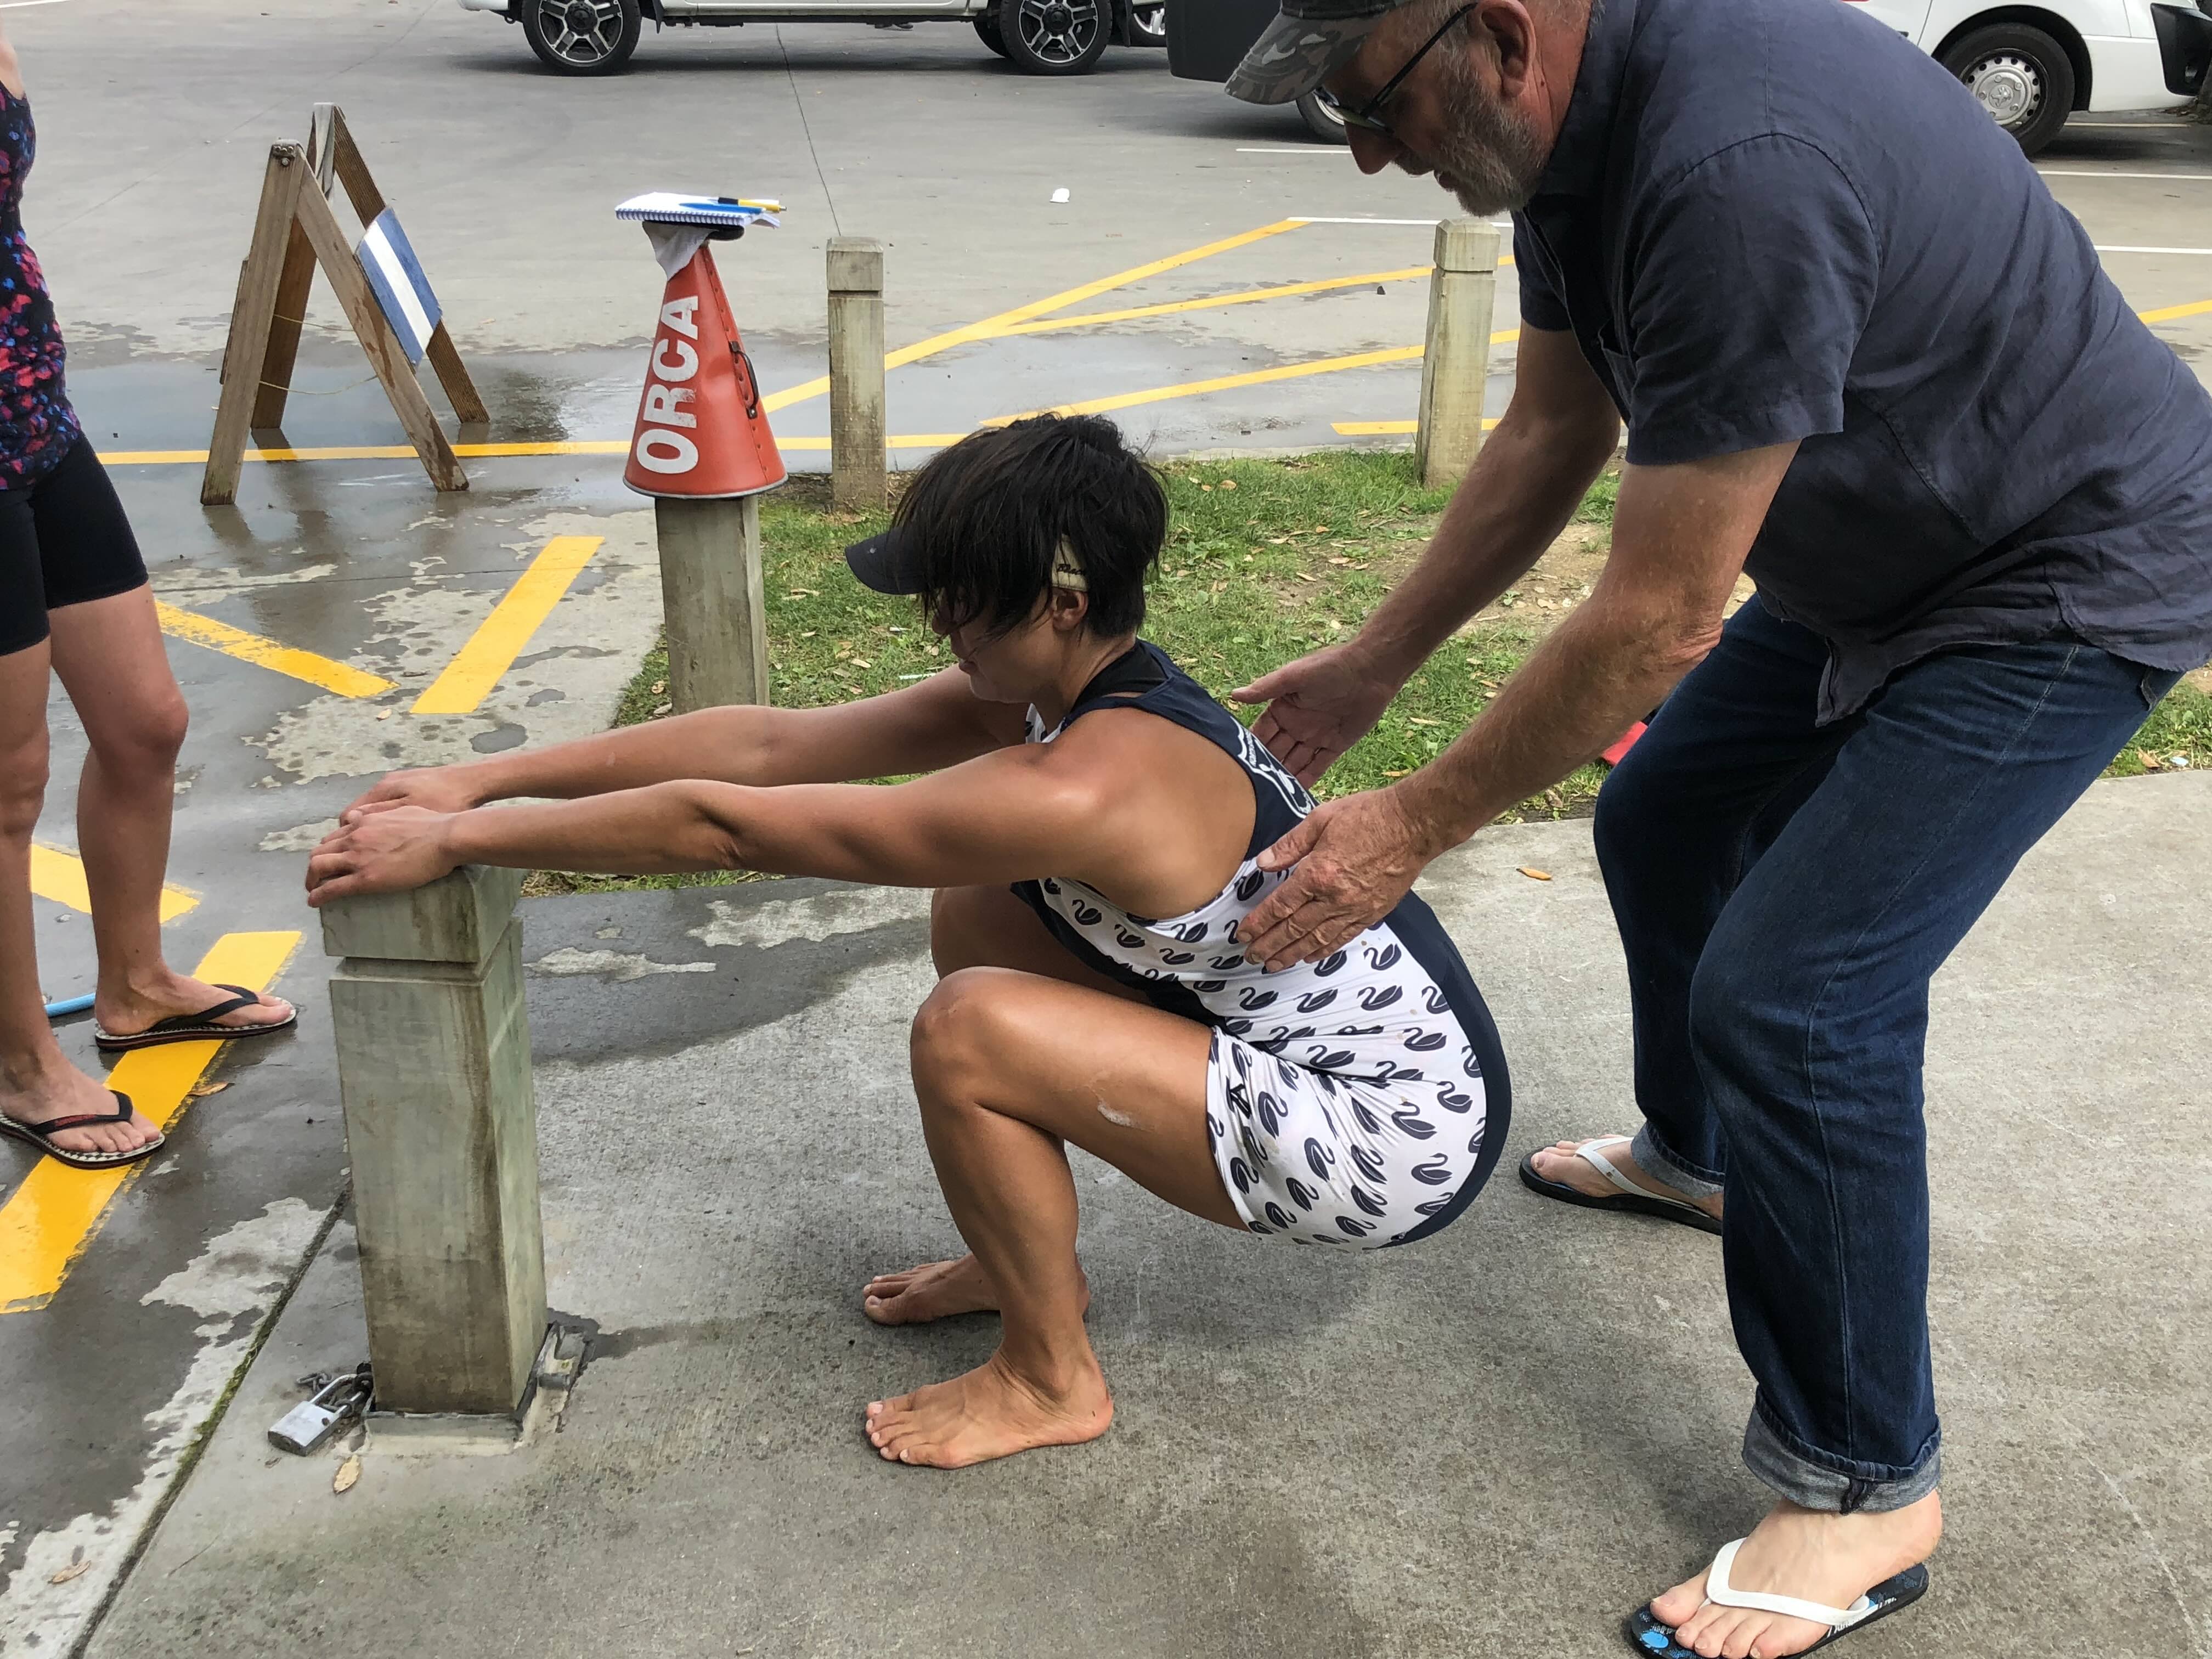
Get better at extracting the oar without being splashy and frantic. And why your elbow position is of critical importance.
Timestamps
The goal is to get the oar out of the water in a smooth movement and as efficiently as possible. Start with the correct set up at the finish. Your handle end should be in line with the side of your rib cage.
Pause at the finish with the oar flat on the surface of the water. This helps you check the height of your handle and your outside hand should be brushing your shirt. The handle height is the same as when your oar is under the water a the end of the power phase. Check you are drawing your finish to the right position.
Outside hand drawing through with pressure and controlling the height of the handle; the inside hand is squaring and feathering. Outside hand pushes down to extract the oar from the water and then the inside hand turns the oar to feather it. Practice this slow motion or in fours/pairs.
Wide grip (inside hand down the loom) helps to teach you which hand controls the handle. By isolating your inside hand closer to the oarlock pivot, it makes it harder to control the handle height with that hand. Control each hand by altering the grip tightness on the handle - loosen the grip alternately to keep the focus (inside/outside).
If your elbow is lower than your wrist it's hard to push down on the handle with the outside hand. Progressively move your hands back to a normal grip starting from wide grip.
There's a tendency for may athletes to have too much control with the inside hand. You're also unlikely to be only feathering with the one hand.
Keep pressure through to the end of the stroke, holding your oar under the water 1 cm longer.
Work your inside hand at the very end of the power phase - the outside hand loses effective power at the end of the power phase because it's at an increasingly obtuse angle to the oar handle. Whereas the inside hand can stay at 90 degrees to the handle. Give an extra pull with the inside hand at the end of the stroke.
Stationary stability drill is a free video joining bonus in our Coach Mastermind Group as a joining bonus. Get yours here
And to your hand grip tightness while rowing. Ensure you aren't dominating with the wrong hand.
Further Resources
Getting an appropriate sized boat for your child can help them find the fun of rowing.
I've read a detailed discussion about this on the Facebook group Masters Rowing International and three main companies are mentioned. [The link requires you to join the group to read the post and answers.]
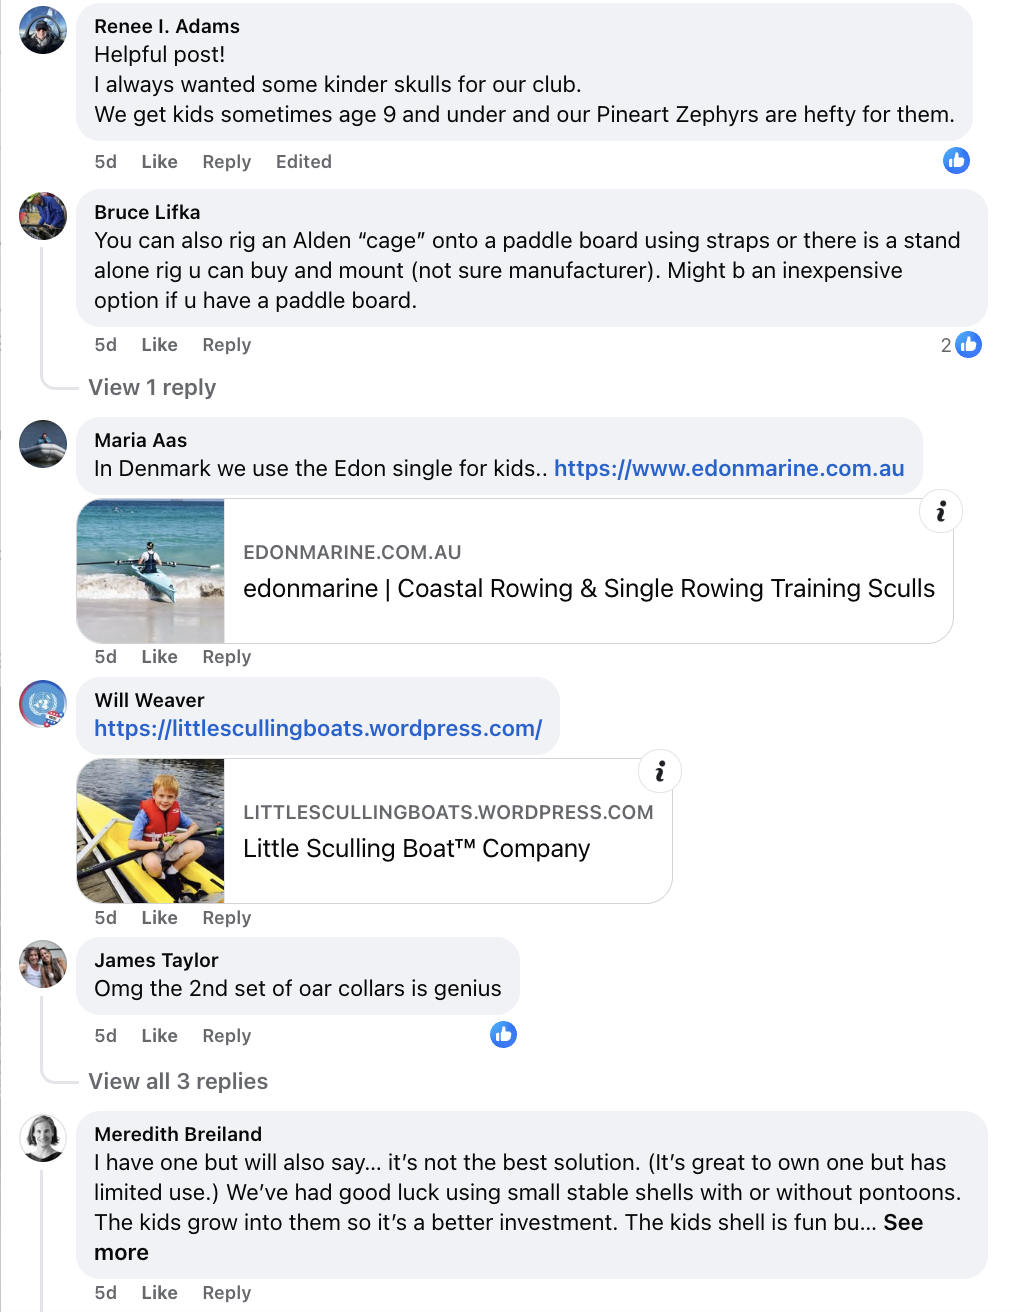
https://www.edonmarine.com.au/
https://race1.com.au/
https://littlescullingboats.wordpress.com/ - this website is up but emails bounce (May 2025)
Join our community and get our exclusive Faster Masters Rowing Magazine, packed with tips, techniques, and inspiring stories. Includes four new articles monthly.