You're preparing to race and are concerned you aren't rating high enough. Why rating matters.
Three drills you can do to get the rate up. What prevents you getting the rate up?
Resource: Practicing Racing Starts
3 Value Bombs
01:15 First you must know what your ideal race rate goal is for the main body of your race. Your training programme should have increasing race rates to help guide you closer to your race rate goal.
Can you get your oars in and out in perfect time with your crew mates? Increase the quality of precise practice. Have a clearly defined sequence of the rowing stroke cycle. Do these movements slowly and then test under pressure (rate, firm pressure).
Can you practice rating higher than your race pace rate?
20:00 What should your rate be in the race? Challenge your preconceptions about race rate by practicing drills regularly. Get familiar with the feeling of getting the boat up to higher rates.
Want easy live streams like this? Instant broadcasts to Facebook, YouTube, LinkedIn. Faster Masters uses StreamYard: https://streamyard.com/pal/d/5694205242376192
Mis-timing the catch causes the boat to slow down. You can go faster for no extra effort.
3 Value Bombs
Timestamps
These three things are super-easy to correct and take no extra fitness and effort. So important for masters to enjoy our rowing and so "speed for free" is great for us.
Roll forward to full compression - there's a micro second when the seat is stationary. This is the moment when you want the oars already under the water.
At the bows' high point you are generally at full slide and closest to the stern of the boat. This is when you want to place the oars into the water.
Get the set-up correct - refer to our earlier episode about Speed Murdering Mistake #2 The Finish.
You should not roll fully forwards before squaring. This movement needs to be earlier in the recovery.
When I published the pause drills video I got some great questions from Dale W. First watch the video in which I explain 3 pause drills and how they help your rowing and sculling stroke.
Dale writes
I like that you say you go through each of the pause positions several times when taking the continuous strokes so it's good for practicing position.
I like that you talk succinctly about what you're doing and don't use a lot of filler about non-relevant stuff. Thanks
Dale W, Faster Master Rower
- Why do you use 'finish' instead of 'release’? I think this is British English versus US English usage.
- if one is pausing at the release with the blades on the water - does that mean they're feathering straight out of the water instead of releasing square and then feathering? - which would put the blade in the air at the pause and the hands slightly in front of the body? Correct. the point of pausing with blades on the water is that it’s NOT the correct sequence - BUT it teaches people to finish the handles at the correct height and emphasises the elbow position. Too many folks finish with handles down in their lap and the oars drift out of the water rather than a defined movement.
- Does feathering involve the fingers/hands/wrists/elbows? Watch this video
- What should things feel like at each of these positions? I can't answer that you have to experience it.
- When the arms are paused away, are the shoulder blades released or kept in place until the body pivots? Kept in place.
- When moving the body over, do the hips move or just the body? Hips move
- Does one do 100% of each position before doing the next motion while continuously rowing or is it just for drills? EXCEPT for the pause with blades on the water, you do 100% of each position before doing the next motion.
- When does one roll up? Early enough to be ready for the placement into the water
- Are the feet doing anything? Pressing into the foot stretcher through the soles.
- I like that you talk about how people can check their positions at each pause - what should one be checking? Watch carefully I explain each position you’re checking that you ARE in that position.
We continue our mini-series on speed murdering mistakes in rowing and sculling. This follows last week's deep dive into blades on the surface .... this week we take a look at Rushing Off The Back. What, how, causes, cures.
Resource: The Finish Posture explained
3 Value Bombs
01:00 These issues are straightforward to resolve. As a coach I can see the solution and until you realise the solution is there, you're ignorant.
The transition from the oar extraction through to when you roll up the slide is our focus area.
08:30 Things to look out for
Look down and see if your elbows are partly bent as you rock the body forwards
Do your thumbs touch your lower ribs?
Are you finishing with handles horizontal or are they drawing down into your lap? Get some video so the finish and your body are in the frame.
The fastest point of boat speed is after the finish. This may sound counter-intuitive - the second surge of speed comes after the oars are extracted and as you transfer your body weight. Rebecca calls this speed for free.
Do 10 strokes normal, 10 strokes separating arms from body to spot the difference.
Want easy live streams like this? Instant broadcasts to Facebook, YouTube, LinkedIn. Faster Masters uses StreamYard: https://streamyard.com/pal/d/5694205242376192
Adjusting your stroke to match your partner. What to do to adapt and adjust so you align with a taller or shorter partner in the rowing boat.
01:00 In the program this month - peak 1k racing in May - August. Drills to maintain power in the stroke. Video how to get to the start calm and ready to race - Christine Wilson's rate progression warm up. Coachability as an athlete skill and attribute. How to write your race plan.
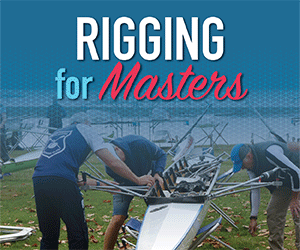
Key to this is to worry less about height but instead focus on the arc of the blade through the water. When you fix up in the boat, adjust your footstretcher so your blades are parallel with your partner's at the catch and finish. Measure distance behind the face of the work / face of the gate. (58-62 cm is a normal range). To learn more about how to do this measurement watch our webinar Rigging for Masters https://fastermastersrowing.com/rigging/ Adjust so your oar shafts are exactly parallel at the finish.
06:00 A taller stroke
The oars will converge during the power phase and the recovery phase if you each row to the full extent of your reach and height. The short person cannot make the same arc as the taller person, especially if their oars are the same length and the gate/oarlock span is the same. When the blade arc is out of alignment, you need to make compromises to get in parallel. Get power aligned by being in the water together at the catch. So to get catch angles aligned means you will need to make compromises in how you row.
For the shorter person - get good body rock forwards at the finish and maintain this through the recovery up to the catch where your shins are vertical. For the taller person - work out how far forward you should roll. Use a drinking straw and tape it to the side of the boat, pointing upwards. So it brushes the shaft of your oar when you are at the correct catch angle to match the shorter person. 08:30 Rebecca's preference is to align with her partner at the catch rather than the finish. Blade alignments are made at the catch and the compromise is at the finish, she extracts her oars earlier. By getting the angle arc right you are more likely to optimise the boat speed and power alignment. Get more length by sitting up tall and letting your arms go wide, over the sides of the boat at the catch.
Want easy live streams like this? Instant broadcasts to Facebook, YouTube, LinkedIn. Faster Masters uses
StreamYard: https://streamyard.com/pal/d/5694205242376192
Ways to use your boat rig to get a longer arc for the oar. Simplifying why it works and some key principles.
Timestamps
00:30 Rebecca's new shiny object is a wing rigger mounted gadget to mount a stroke coach and water bottle over your rigger.
Check out the 3Drow website for 3D printed rowing accessories.
Having the oar in the water longer (distance rather than time). Taking the tip of the blade through a greater distance each stroke. Use the principle of the lever to understand how rowing oars and sculls work to propel the boat. Inboard and Outboard ratio is important to understand. With longer levers you need a greater force on the handle to move the oar though the same arc in the same time.
As long as your athlete has the physical strength and power to move the oar through the water then you can use longer oars. There is a point of diminishing returns. The rowing sliding seat was invented to increase the arc through which the oar is rowed through. A longer slide gives a greater arc.
05:00 Does the athlete have the oar handling skills such that they can put the oar in the water at full reach at frontstops so you don't miss water?
Missing water means you have a shorter stroke than you are capable of. Rigging a longer stroke is a good solution for someone who is less skilled in bladework.
Suggest the athlete rows on a longer arc.
A physically short athlete where you want them to have the same oar arc as other crew members. Shorten the inboard and adjust the outboard so their gearing is the same as the rest of the crew.
This might be useful for you to try. Check the rigging diagram from Stephen Aitken - rowing angle changes presentation
08:00 Study the arc through which the rower's arm and oar moves during the power phase. The solid line shows a reduced span (moving the pin closer to the side of the boat). Th length of arc is determined by the athlete's anthropometrics (leg and arm length) and torso (height). A formula to calculate typical arc lengths.
10:00 For small changes of span/inboard this is a useful assumption.
Review the faulty logic - Only change one thing at a time (not always possible as one change affects other parameters)
- Options of things you can change span, inboard, stretcher position, gap between handles at the finish for sculling. Which COULD you change to lengthen the stroke?
12:00 The conclusion that there's only one option that works Reducing inboard and span equally and adjusting footstretcher to keep the handle gap the same at the finish works with increases in all angles - catch and finish. Stephen recommends first reducing the inboard and then reduce the span equally.
Keep oars the same - similar inboards for quad/double and adjust for single. For sweep adjust for eight/four/pair.
Different situations call for different turning methods. I bet there's at least one you haven't tried yet.
00:45 Turning a boat sounds easy What is your goal when turning the boat? Where you are on the water now and where do you want to get to after the turn. Consider the local rules of the river / navigation.
03:00 Slide length - half slide or full slide rowing to turn the boat. Half the crew can row on bow/starboard and the others back down on strokeside/port. Consider the catch angle - the more acute it is the bow will turn faster.
If alternating ensure the other side is ready to start as soon as the other side has finished. In sculling, let your resting side follow the other hand out to the catch and then it's in the right place to take the next stroke. This make the turn faster - less delay between strokes. Important if there's a current pushing the boat. Invest in yourself
Rowing VIP Day - invest in yourself.
One side holds water and the other side rows. A shorter arc drag turn - only use the stern athletes checking water - so the retarding force is in the stern of the boat. Then have the athletes rowing be only in the bows to tighten the turn.
12:20 Chop turn - sit stationary legs and arms straight. One side turns the blades upside down and you lift your handles up and down. The curvature of the blades will slowly start to turn the boat. 13:20 Use end pairs to turn. In an eight have 8&6 back down and 1&3 row on. The middle athletes hold the boat stable while those with the most leverage are rowing.
14:20 Use the current on a river - start to turn the bows into the current so it's in the stream, that force pushes the bows around when turning into the stream (to go with the stream after the turn).
The fastest way to stop a moving rowing boat - bury a feathered blade under the water. It quickly brakes and as the boat slows you can gradually square. This is an emergency stop method. If you try to check with a squared blade the speed of the water tends to push your oar out of the water. Using a feathered blade is my preferable method to check the boat.
Place the tip of the oar onto the water, blade feathered (the wrong way up). When backing down you can either do this with the oar upside down or with the oar the right way around. There are different advantages. The counter-feather makes it easier to keep the boat balanced on the backing side of the boat. Allows you to keep the boat level while turning and helps guide spatial awareness of where your oar tip is in space (if it's touching the water, you know).
Turn the rudder in the direction of the turn. Get a good turn by starting the turn just as the crew finishes rowing. As they stop, think about your destination at the end of the turn. Easy at high balance - the boat runs on unchecked. You start to turn and then get the side of the boat on the inside of the turn to check it / hold water using the feathered water. This helps get about a third of the turn done before your crew starts backing. This shows your intent to other crews who are around you so they know what you're doing.
Want easy live streams like this? Instant broadcasts to Facebook, YouTube, LinkedIn. Faster Masters uses StreamYard: https://streamyard.com/pal/d/5694205242376192
Moving up the skill ladder from beginner to intermediate and then advanced requires improved skill. These 9 drills are essential for you to master, and to revisit regularly.
Timestamps
01:00 The skills ladder - a helpful concept to guide your learning as you progress. Execution to a high standard is the main difference between advanced scullers and beginners.
Coach Mastermind group - join us Get the skills checklist (Beginner, Intermediate and Advanced) helps coaches decide what to teach next. Allows you to teach a mixed ability group - all doing the same basic drill.
1 - Legs Only - from the catch to legs straight. Watch for keeping shoulders sternward of the hips. It's good for teaching the timing of placement aligned with the seat change of direction and gripping the water at the start of the power phase. Do it square blades for beginners and the most advanced single scullers.
2 - Legs and Back Only - keep the arms straight. Teaches the transition from leg drive to adding the back swing. An exaggeration version is to complete legs before the back swings. This helps to recruit other muscles into the stroke power delivery. Variant - 10 strokes legs only, 10 strokes legs and back rowing.
3 - Wide Grip - sweep inside hand down the shaft; sculling hands on end of rubber grip or on the shaft. This increases the load in sculling to help to feel the grip connection at the catch - notice when the oars are in the water. Sweep it's useful to teach the outside / inside hand movements. The outside lifts the oar into the water. Variant - progressively move hands back to normal grip.
4 - Inside Arm Only - sweep only. Use this to time feathering and to load up the leg drive at the catch. Variant - hold outside hand and put inside hand onto backstay. This teaches how to rotate around the gate.
5 - Quarter Slide Push - the start of the power phase (reverse pick drill). Use only the first quarter of the slide from the catch. How to grip the water before you drive, timing the catch placement with the seat changing direction. Variant - do the the drill slowly and have inside hand hold the back of your seat to work out where the seat stops moving - that's the timing point to place the catch. The handles move faster than the seat on the recovery.
6 - No Handle Rowing - for the indoor rowing machine (dynamic is best for this drill). Put the handle down and roll up and down the slide - push in the power phase. This helps to teach the ratio and rhythm especially to athletes who rush the slide. They move in time with the machine. Pick up the handle and keep the legs working the same and later add in the arm draw. In a crew boat have half the crew sit the boat - push the handles away so the oars are parallel with the side of the boat. They must do it in time together.
7 - Left Hand Lead - get the sequence off the finish to the cross-over with the hands nested tightly together. Delay straightening the right hand, hold it against your chest as the left hand straightens. Teaches the left hand to move faster to the crossover so it can get in front of the right hand. Variation - do it with an intermediate position gradually reducing the right hand's waiting time. Check the body is leaning back in the finish position - no body movement during the drill.
8 - Single Strokes to Weight on the Feet - a pause point where you can get weight onto the soles of your feet. This position is important because it's where your body catch angle is set and is the point to deeply relax your legs during the recovery. It gives you feeling of moving with the boat.
9 - Double Quick Hands - move from the extraction at the finish to the arms away position twice as fast as normal. Then move to normal speed. It's a good way to follow on from the Left Hand Lead exercise. It develops the smoothness of the handle tap down and feather movement. Variant - make the double quick arms and body swing finishing it at weight on the feet. Another variant is to do double quick hands and then do a double slow slide.
24:45 Do these drills regularly - that's the important part. Your boat skills reduce when you have time out of the boat. Use these drills to re-familiarise yourself when you get back into the boat. Lose fine motor skills quickly and your catch placement timing is what you'll lose first after time out.
Want easy live streams like this? Instant broadcasts to Facebook, YouTube, LinkedIn. Faster Masters uses StreamYard: https://streamyard.com/pal/d/5694205242376192
Upskill your technique with some self-coached drills. This week we focus on your hand holding the handle - fingers flat on the recovery.
Timestamps
00:30 The open palm drill helps with getting improved skill handling the oars and sculls in the boat is key to improving your boat comfort. It sorts out your grip and handle placement on the recovery.
It teaches how to have a loose grip on the recovery and also to have the weight of the oar in your hand so you can control the handle for correct feathering. Also, via the fulcrum you control the tip of the blade. This is a semi-advanced drill - not for beginners.
Take the oar out of the water at the finish, feather and extend your arms and at that point straighten your fingers so the oar handle rests under your palm (where the palm and fingers meet). Have a straight line from knuckle, wrist and elbow. Put downwards pressure on the handle without gripping it.
Then rock forward and move through the recovery, bend your knees and roll up the slide. When you get to the position where you would normally square your blade, wrap your fingers around the handle and roll the blade square. And you’re ready to take the catch.
Row a normal power phase, then repeat the open palm recovery.
Start stationary - practice while sitting in the boat - arms straight and open fingers and wrap them back around the handle. Develop a sense of the amount of downward pressure needed to keep the handle at the same height and how to use the motion of wrapping the fingers around and squaring simultaneously. Check exactly where athletes are holding the handle on their palm. When wrapping the fingers - make it smooth and lead the wrapping movement into the squaring movement.
You have done it correctly when the blade is square the your knuckle/wrist/elbow are in a straight line.
Row ten strokes of open palm rowing alternate with 10 strokes normal rowing. Can you stay in rhythm, all square together and stay in time on the recovery while opening the fingers without losing control of the oar? Good to use in warm up or during a steady paddle workout.
07:00 How much grip pressure is needed on the handle.
10:00 Advanced drill variations
Want easy live streams like this? Instant broadcasts to Facebook, YouTube, LinkedIn. Faster Masters uses StreamYard: https://streamyard.com/pal/d/5694205242376192
Join our community and get our exclusive Faster Masters Rowing Magazine, packed with tips, techniques, and inspiring stories. Includes four new articles monthly.