Are you staring at a rowing program subscription page wondering whether the price is reasonable or a rip-off? You are not alone. The range of what online / remote rowing coaching costs is genuinely bewildering: we have seen plans priced anywhere from $12 a month to nearly $3,000. The good news is that once you understand what drives the price, the decision becomes much clearer.
The first question is not 'how much?' but 'what for?' Rowing coaching and training programmes divide broadly into three types:
The price you pay should reflect the service level, not just the branding.
Here is an honest picture of what is currently available across the full range of the online rowing coaching and training programme market:
| What the market charges (US$) Machine-only plans (erg focus, limited or no coaching input): $12 to $30 / month Structured on-water programme, no live coaching: $39 to $220 / month Plan plus live group coaching (hybrid model): $110 to $220 / month One-on-one personalised coaching with regular feedback: $400 to $650 / month Elite or intensive personal coaching: $300+ / week or $3,000+ for a multi-day camp |
Within those tiers, price varies with the provider's level of expertise, the degree of personalisation, and whether the programme has been built for your specific category of athlete.
To give you a sense of the broader landscape: at the erg-plan end, Rojabo starts at around $12 a month, with Fitness Matters at $18 to $30 and UCanRow2 at $27. For structured on-water programmes, Row Elite offers a six-week focused plan at around $40, and Edge Rowing runs from $80 to $150 per month. TopCrew Academy, based in Australia, offers essentials coaching at US$220 per month, stepping up to $159 a week for personalised performance coaching and $299 a week for elite-level support. At the upper extreme, Xeno Muller's one-on-one programme sits at just under $3,000 a month.
One tier worth understanding is the hybrid model: a structured training plan combined with weekly live group coaching sessions. Providers offering this sit between a self-directed programme and fully personalised coaching. You gain accountability and regular interaction with a coach, without the cost of one-on-one attention. Aram Training offers this model from EUR 99 per month for a plan-only programme, EUR 199 for plan plus live coaching, and EUR 499 for the full performance package including weekly one-on-ones.
Most programmes on the market are built for competitive rowers across all ages. That matters more than many athletes realise.
Masters athletes over 40 face a physiological reality that generic programmes do not address: slower recovery, hormonal changes affecting adaptation, injury patterns that differ from younger rowers, and technique priorities shaped by decades of movement history. A programme written for a 26-year-old national squad hopeful will not serve a 56-year-old who trains four times a week and wants to podium at the World Rowing Masters Regatta.
Age-appropriate programming is not a premium add-on. It is the core of what you are buying when you choose a masters-specific service.
Our individual monthly programme costs $59/month; our crew programme is $87/month. That places us firmly in the structured on-water tier, at the accessible end of the market.
One important caveat: our programmes are not designed for beginners. We are best placed for masters athletes who want to race and are already training at least three times a week. If you are new to the sport or returning after a long break, a beginner-focused in person club programme is the right starting point. Once you are training consistently and want to race with purpose, that is when Faster Masters adds real value.
For that monthly investment, you receive age-specific periodised training written by coaches with deep expertise in masters physiology, a resource library (masters rowing magazine) built specifically for 40+ athletes, and programming designed for the competitive masters calendar. We are not a general service with a masters label attached.
If you are weighing up a machine-only plan at $15/month, the honest question is: are you training primarily on the erg, or on the water? If the former, an erg-focused service may genuinely suit you better. If you are a competitive on-water masters rower, the gap in value is significant. Age-appropriate water-based programming, built by masters coaching specialists, is not available at the erg-plan price point.
If you are considering a fully personalised coaching service at $150 to $640/month, that is the right choice when you want individual video analysis, regular one-to-one feedback, and a programme adapted specifically to your physiology and goals.
Review our programmes and download a sample.
Tick the statements that apply to you:
The more boxes in the lower half you tick, the more valuable a masters-specific on-water programme becomes. If the final two apply, personalised coaching is worth the investment.
The right spend is the one that matches your goals, your training environment, and your stage of the sport. Cheap and generic costs more in the long run.
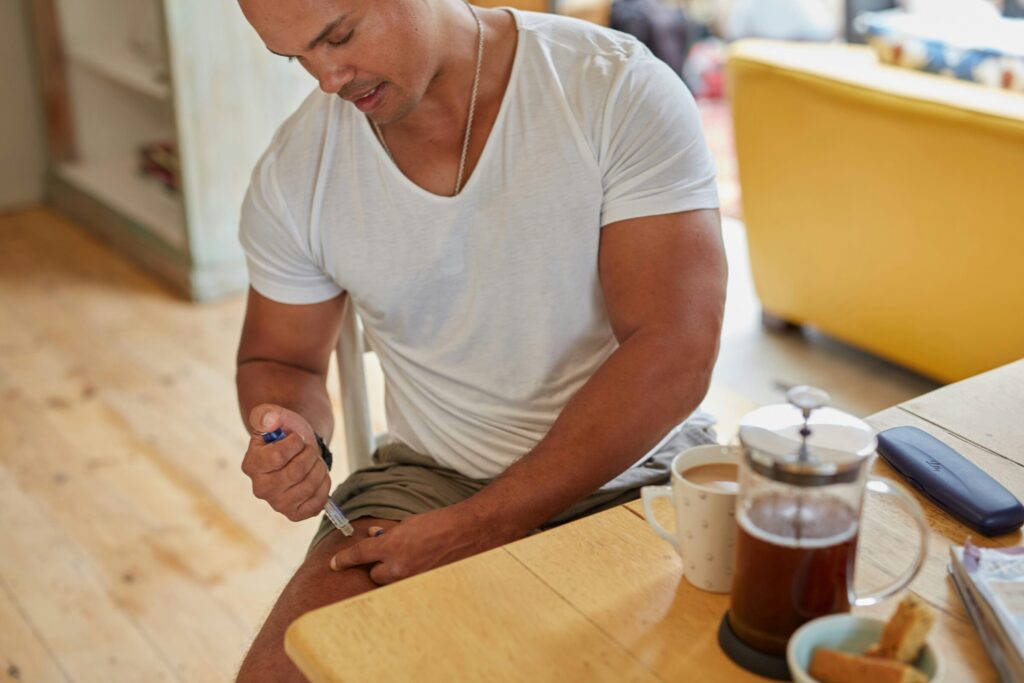
Picture this: you have just lost 20 kilograms, your boat speed has not dropped, and your coach is asking you to come in for a rigging adjustment because your reach has changed. That is not a hypothetical. It is exactly what happened to masters rower Dan Cheung after two years on Ozempic for Type 2 diabetes.
GLP-1 receptor agonist drugs, names you will now hear regularly at the boathouse, Ozempic, Wegovy, Zepbound, Trulicity, are no longer just a medical story. They are a rowing story. And as masters athletes, we need to understand what they do, what they change, and how to train well while taking them.
GLP-1 stands for glucagon-like peptide-1, a hormone naturally produced in the gut after eating. GLP-1 receptor agonists mimic this hormone, signalling to the brain that you are full, slowing gastric emptying, and regulating blood glucose. They were originally developed to manage Type 2 diabetes and are increasingly prescribed for weight management in people with obesity or related metabolic conditions.
Drugs in this class include semaglutide (sold as Ozempic for diabetes management and Wegovy for weight loss), tirzepatide (Zepbound), and dulaglutide (Trulicity). Most are administered as a weekly injection, though an oral pill form of semaglutide has recently become available in some markets, including the United States.
Prescribing is expanding rapidly. Estimates suggest tens of millions of people worldwide are now taking these medications, and they are increasingly turning up in endurance sport settings, including masters rowing.
The reasons vary considerably. Some are managing Type 2 diabetes. Stuart Miller, an orthopaedic surgeon and masters rower, has an unusual variant called MODY (Maturity Onset Diabetes of the Young):
"My A1C went from 7.1 to 6.4 and my weight dropped from 192 lbs to 168 lbs. Very successful in combination with exercise." Stuart Miller,
Amy Sullivan is using Trulicity off-label for glucose control rather than weight loss: "I have Type 1 diabetes and am using it for glucose control and not weight loss." And Karen Klinger, a masters coach and competitive athlete, had already lost 20 pounds through diet alone before adding Tirzepatide. She describes what that earlier phase felt like: "I was ALWAYS hungry. I had to eat for volume, big salads, soups, watermelon, just to try to feel full." She has now lost 75 pounds in total, 55 of them on Tirzepatide.
Marianne Salter Jett, who rowed in college and has remained active throughout her life, describes weight as something she has struggled with for as long as she can remember. At 52, she is now lighter than she has been since her teenage years: "I am a much better rower because I am not carrying around extra weight in the boat."
Others are using GLP-1 drugs primarily for weight management. Jayme Deerwester and Christine Henken are both active masters rowers who have continued training throughout. The point is that GLP-1 users are not a homogeneous group. The reason for taking the drug, and the dose, shapes the experience considerably.
Here is where it gets directly relevant to us as athletes. These drugs alter several things that matter enormously to how we train and race.
1. Gastric emptying slows significantly
GLP-1 drugs delay how quickly food moves through the digestive system. For training and racing, this has real consequences. Christine Henken found that her pre-training fuelling window closed much earlier than it used to:
"Previously I knew I could eat something at 15:30 if I had 18:00 training, but now the cut-off is more like 14:30 at the absolute latest, otherwise I feel bloated and nauseous during training." Christine Henken
Chrysta Castaneda, a lifelong competitive athlete, has developed a specific race-day protocol to work around this: "For rowing, where you do not want a full stomach, and GLP-1s slow gut processes, that means getting enough carbs the night before. During a regatta I eat small carb snacks after a race, before the next. Bigger meals have to wait until post-event."
2. Appetite suppression requires intentional fuelling
The reduction in hunger is often described as the most dramatic effect. But for athletes training hard, this is a two-edged sword. Feeling less hungry does not mean needing fewer calories or less protein.
Amy Sullivan is direct about this: "I am careful to be sure I am getting enough protein. If appetite is decreased, people need to be sure they are eating nutrient-dense food." Chrysta echoes it: "Hunger is diminished but you still need to fuel. You have less capacity for quantity of food so choices have to be intentional."
Karen Klinger frames it in a way that will resonate with any athlete: "Kind of like having a broken gas gauge. You know you need fuel, just not sure when, so you keep topping off the tank." She ate for quality rather than volume, starting with protein at every meal, and measured her food carefully in the early months to understand what she was actually consuming.
3. Muscle loss is a risk, but a manageable one
One of the most discussed concerns around GLP-1 drugs is the potential for muscle mass loss alongside fat loss. The contributors to this article took that risk seriously and addressed it actively.
Stuart Miller took a proactive approach: "Worried about muscle mass loss, I started more erging and then took learn to row. I got in 750,000 metres on my erg during the winter." Karen Klinger went further, having her muscle mass scanned at baseline before starting Tirzepatide, then rescanning monthly. She kept strength training and erging throughout, walked a great deal, and added a small daily creatine dose to her smoothie.
Marianne Salter Jett, meanwhile, offers a counterpoint to the idea that muscle loss is inevitable: "I think all the news about muscle loss and side effects are because people are taking too much of the medication. If you stick to low doses and do it all gradually, it can be an amazing tool and you can live and do all the things you have done seamlessly."
This aligns with what several contributors found: side effects were most pronounced at higher doses or during dose increases, and often settled with time.
4. Nausea can cap training intensity
This is the side effect that most directly affects performance. Christine Henken found a ceiling on her heart rate that was not there before: "If my heart rate goes over about 165 I get nauseous. I have only puked once post-erg, but I cannot push myself into the pain cave like I could pre-GLP-1, so learning to control my heart rate is something I am continuing to work on."
Not everyone experiences this. Jayme Deerwester's side effects at her current dose have been mild: "Minor constipation and I am a wee bit burpy at Monday practice. It has not negatively impacted my rowing at all."
Karen found that nausea was directly linked to volume: "Keep meals small and take your time. Nausea and stomach discomfort come from too much volume." She also managed constipation proactively, using fibre, water, and a daily Miralax addition to her breakfast smoothie.
5. Dose changes need careful timing
Several contributors flagged that side effects are most pronounced when a dose increases, making timing important for competitive athletes. Jayme's approach is practical:
"I am about to go up from 2.5mg to 5mg, but not until after my regatta this weekend. If there are side effects from upping the dose, I do not want to find out when my only bathroom option is a porta-potty, or worse, in the boat." Jayme Deerwester
Karen's advice on dose is worth noting: "I stopped at the lowest dose that still allowed me to feel legitimately hungry rather than just munchy. True hunger is a good signal."
The broad answer from this group is: not negatively, and sometimes positively, once the adjustment period passes.
Chrysta argues it can actively help: "It stabilises blood sugar and hunger and facilitates athletic performance in my opinion." Jayme has noticed structural benefits: "In addition to losing 8 lbs, my inflammation is down and I am less bloated around my midsection, which makes it easier to lean into body over."
Dan Cheung's experience is perhaps the most telling: "I lost enough weight that I had to make big changes in my 1x rigging. No appreciable changes in my training plan."
Karen has sized down twice in her single and adjusted her rigging to reflect an increased reach and stroke length as her body changed. She also sought coaching to support what she calls a technical reset. Marianne Salter Jett agrees that the boat simply moves better: "I am a much better rower because I am not carrying around extra weight in the boat."
Karen Klinger's contribution to this article goes beyond the practical. Her reflection on years of struggling with weight, even while training at national team level in her twenties, adds something the performance data cannot capture:
"Years of trying to diet and beating myself up about my weight were not wasted, but certainly misdirected. Even training at the national team level in my 20s, and having coaches measure weight and body fat, I struggled with eating. This has been a miracle." Karen Klinger
For many masters athletes who have carried the same weight struggle for decades, that will be the most important sentence in this article. GLP-1 drugs are a tool, not a magic pill, as Karen herself notes: "To be strong and healthy while losing body fat requires work, diligence and time." But used thoughtfully, they appear to be a tool that works.
Stuart Miller has found that endocrinologists are not recommending the lowest dose possible. Perhaps for non- diabetics but for those with higher sugars, the docs are seeking the lowest A1c and diminishing glycosylation. We should mention that this one is controversial and diabetics should consult with their medical doctors .As with all medical advice, consult with your doctor, medicolegally a wise move!
Based on the collective experience of the rowers who contributed to this article, with particular thanks to Karen Klinger, whose methodical approach offers a useful framework:
| KEY TAKEAWAYS GLP-1 drugs slow gastric emptying: adjust your pre-training fuelling window accordingly. Appetite suppression does not reduce your body's need for fuel and protein. Monitor muscle mass and keep resistance training throughout. Time dose increases away from regattas. Stop at the lowest effective dose: true hunger is a useful signal. Expect to revisit your rigging and technique as your body changes. |
We would like to hear from more rowers using GLP-1 medications. Share your experience in the Masters Rowing International Facebook group or contact us via fastermastersrowing.com.
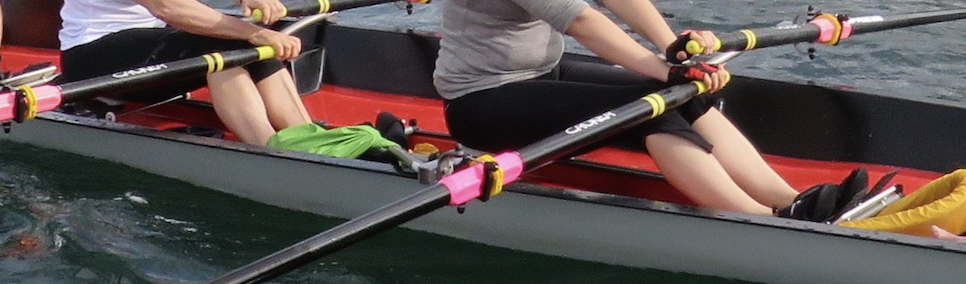
Three cheap and simple hacks to help your sweep rowing. Small clever fixes to real problems that sweep rowers deal with all the time.
Timestamps
Tricks and techniques for your own rowing - a low cost, improvised fix to a persistent problem. The best hacks give you physical feedback in the moment as a constant reminder so you don't have to keep something front of mind. Moving you into unconscious competence. Learn more about unconscious competence and the 4 stage adult learning model https://fastermastersrowing.com/rowing-technique-makes-my-brain-hurt/
If your inside hand moves up and down the handle - it drifts. This affects the amount of effort / load you can put onto the oar from square off to the finish. Take an elastic band and wrap it around the oar handle so it sits on the outside of your hand next to your little finger. If the band is tight, when your hand starts to move it won't roll the elastic band - you'll feel it and realise if your hand has moved off position. If your hand goes the other way, put the elastic band next to your forefinger instead. First check you have the correct spacing between your hands first.
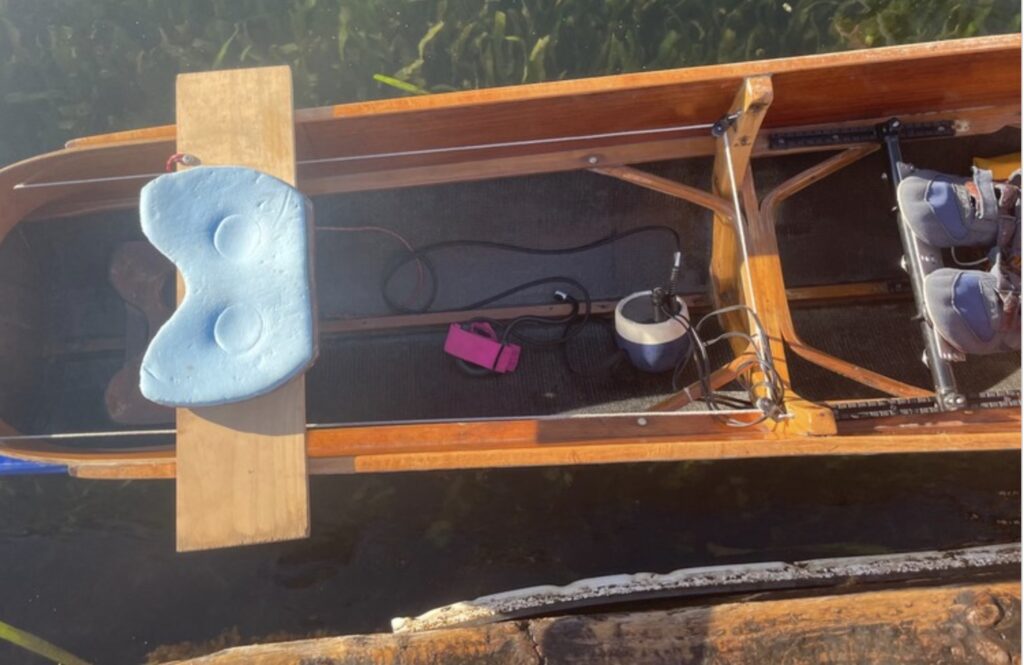
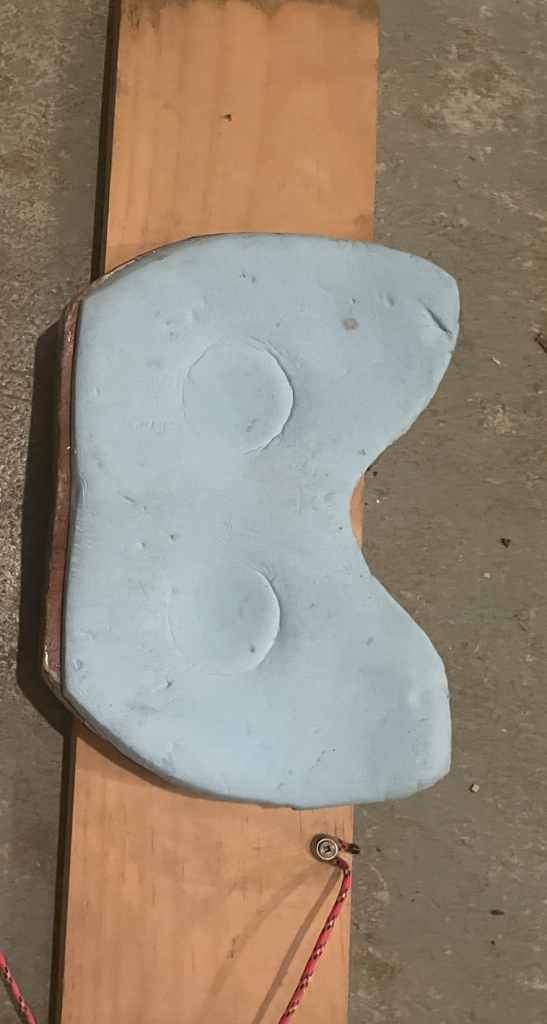
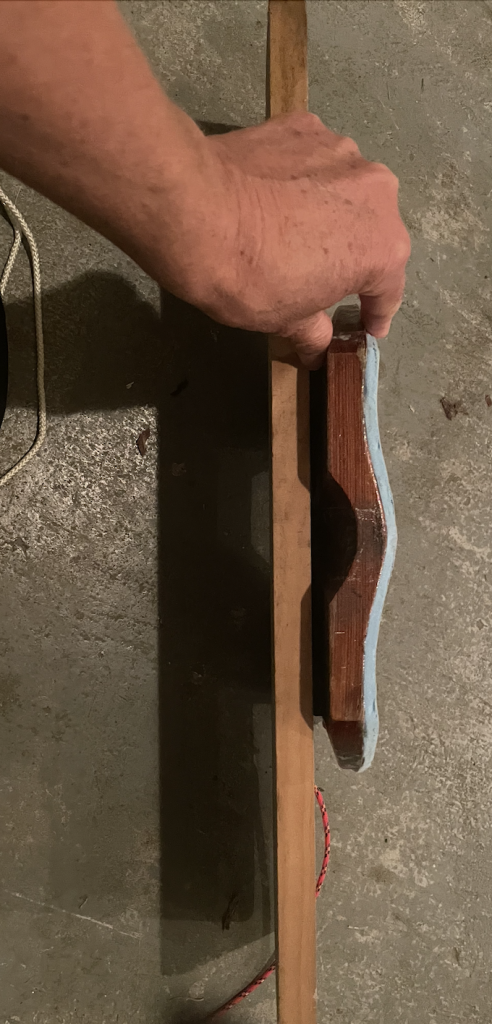
When you have someone who is too large to fit into the coxswain's seat - use the coxing plank. A plank of wood sitting across the transom / sax board of your eight. We put a sculling seat on top so it's comfortable to sit on. Put your feet into the bottom of the boat. And add a lanyard to attach to the steering wires in case the plank moved or fell off and it remained attached to the boat. The cox can then see above the heads of the athletes giving greater line of sight for coaching the crew. If your crew has to take turns steering the eight - this is the hack for you. [More images below.]
If you feather with both hands and twist your wrist to turn the oar when squaring and feathering - this is for you. The correct sweep feather action is to allow the oar handle to turn inside your hand grip for the outside hand, while only your inside hand wrist rises or lowers to turn the handle.
Take a piece of tape - sellotape/scotch tape or micropore or masking tape or electrical tape. Run it from your knuckle across your wrist and to your lower forearm. The idea is that it sticks to the hairs on the back of your hand so when you turn your wrist (and you shouldn't) it pulls on the hairs. This hurts.... you feel the tape tighten and serves as a reminder not to move your wrist.
Guest article by Gennadii Ochkalenko
Dear Friends, Colleagues!
I am Gennadii Ochkalenko, Rowing Coach. I have been in Rowing since 1968 and coaching since 1975.
I would like to propose a completely new direction for rowers for Masters’ Rowers.
I've approached regular clubs, universities, juniors several times.
But they're all focused on victories, medals, points, rankings, and so on.
Their work is judged solely by these metrics only.
Masters, on the other hand, have significantly more freedom in their actions; they plan their activity independently.
This isn't a gamble; I've been thinking about and planning this program for many years.
I am also no longer a young man and I am responsible for my words and actions.
I've discussed it with FISA officials. The response was favorable, but they'd like to see samples.
Therefore, I need people to implement this program.
This doesn't require any competition between participants, but it's new, beautiful, exciting, and suitable for all ages.
I hope the veterans will be able to demonstrate all of this to the youth.
Any rowing equipment is suitable for participation; no expensive, latest-gen brands are required.
It does not require any special physical or anthropometric data, nor does it require grueling high-intensity sessions, similar to those for racing.
If needed, I could also be of assistance as:
For individual sessions, who will need it.
Besides, I am a qualified Coach for People with Limited Physical Opportunities (Visually Impaired and Amputee Rowers), who can participate in the program equally with everyone else.
Have extensive international experience.
Due to certain circumstances, I would like to offer my program to European clubs and teams first and foremost.
I will be ready to immediately provide detailed information to interested people and answer their questions.
Thank you for your time and understanding.
Sincerely,
Gennadii Ochkalenko,
International Rowing Coach.
My email is: [email protected]
Limiting beliefs can hold you back due to fear of failure. Is this the biggest hurdle for your rowing progress?
Timestamps
I would love to go and race at (this regatta) but I don't want to come last. What is it that they are frightened of? Would you like to do the world masters regatta?
What holds us back? Feeling well prepared for your event is important but masters' fears show up differently than kids'. Children are less good at thinking through the consequences of their actions. Anxiety holds you back from trying new things. A mind shift to assess what failure means to you. A failed piece is one where you have learned nothing about your own effort or your own pacing. Did you stay within your capabilities? Did you try anything different, notice anything different?
Try to think differently about "failure" in training - we should feel safer here and able to try new things. Some feel more anxious when rowing with more experienced athletes - how could you give confidence to someone less experienced than you? Buy the worst house in the best street - a definition of success tends to look up (better) than you.
While out practicing, could you try a high risk drill during your training? Take the training wheels off and take a risk - limited but "do-able". What about a 5 stroke rule - commit to doing five strokes of your new thing / drill in a way that is confident and reflects your new norm. Do it at the same point on your waterway every single time you go out. Even if those strokes aren't perfect you will still learn from them. The point is the repetition and becoming more familiar and this builds confidence.
When you come off the water after rowing you do a debrief - what did I do well, what could I deliberately risk next time? Use understanding risks as a mindset change to help you conquer your fear of failure. It only needs to enable you to feel just a little bit more capable of trying something different.
A limiting belief is something you tell yourself but which you won't get past unless you try. "I cannot do square blades" won't enable you to learn square blade rowing. Challenge your limiting belief or it will stay with you. Taking risks may help you get more satisfaction from your rowing by learning something new. In the debrief, share one good failure you had and what you learned from it.
Fear of failure steals boat speed more than lack of fitness. Pick one "low stakes" thing which you can try this week - intentionally take a risk. How did you go, what happened as a result and did you learn something from it?
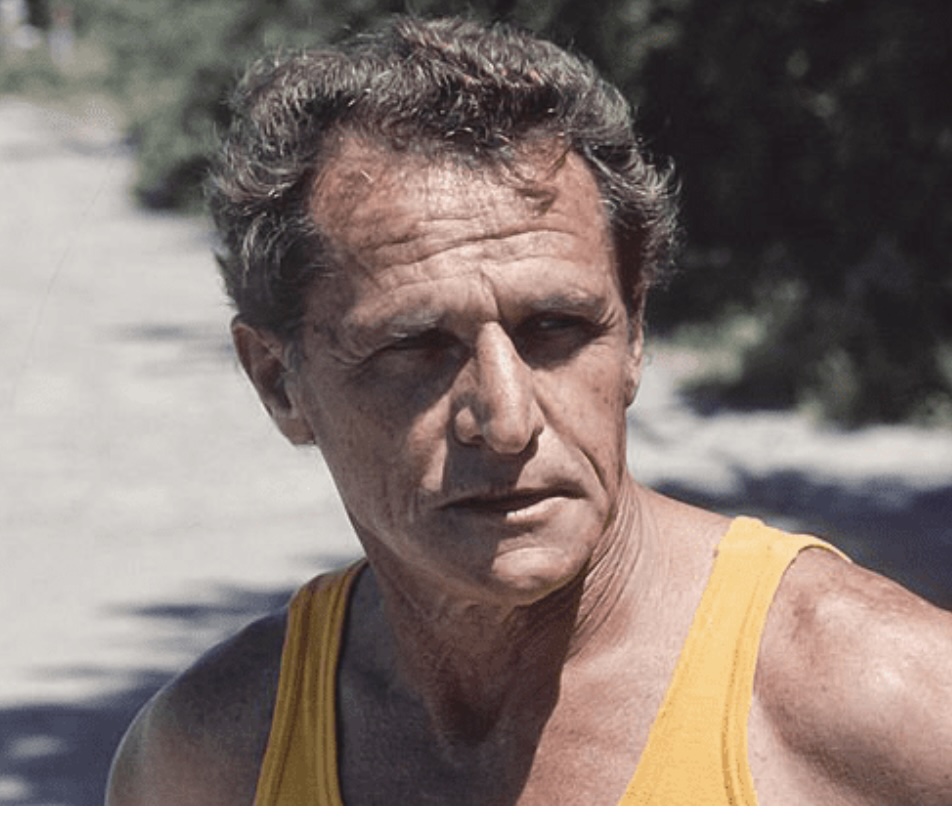
David Finniff is a former middle distance runner, who was trained by Lydiard, now a masters rower.
Endurance training in rowing is often discussed in terms of heart rates, watts, and lactate, but the principles that matter most were established long before any of those tools existed.
This article grew out of a conversation with Rebecca Caroe, when I mentioned that I was coached for six years beginning in 1971 by the legendary Auckland-based track coach Arthur Lydiard. Rebecca asked three simple but important questions: What did Lydiard teach? Why was it innovative? And where do we see parallels in rowing today?
Arthur Lydiard was a relatively unknown running coach until the 1960 Rome Olympics, where athletes he coached delivered extraordinary results. Peter Snell won gold in the 800 meters, Murray Halberg won gold in the 5,000 meters, and Barry Magee earned bronze in the marathon. Four years later, at the 1964 Tokyo Olympics, Snell won gold in both the 800 and 1,500 meters, while another Lydiard athlete, John Davies, captured bronze in the 1,500.
These performances sparked global interest in Lydiard’s training philosophy. He published Run to the Top in 1961, outlining the program behind those Olympic medals. After 1964, Lydiard worked widely with coaches and athletes. I first met him during his U.S. lecture tour in 1970, after which he coached me primarily through correspondence, with occasional inperson meetings during later tours.
Lydiard’s training system was built around two primary goals: developing sufficient endurance to maintain race-winning speed over the full distance and structuring training so that peak fitness is reached at precisely the right time for a major championship or Olympic race.
To achieve this, he developed a periodized system based on a deliberate balance between aerobic and anaerobic work. His approach consisted of three clearly defined phases: Marathon Conditioning, Hill Training, and Race Conditioning guided by his enduring motto: “Train, Don’t Strain”.
Through years of self-experimentation, Lydiard concluded that running approximately 100 miles per week for ten weeks, plus any supplementary mileage, was ideal for developing cardiac efficiency and improving oxygen intake, transport, and utilization. This work followed a hard/easy structure, with three long runs and four medium runs per week.
A hallmark of this phase was the extra-long Sunday run, famously conducted on the 22 mile Waiatarua circuit near Auckland. These runs were performed at a brisk but conversational pace, a level we now recognize as Zone 2 or UT2 training.
What follows is the marathon-conditioning program Lydiard prescribed to Halberg, Snell, and Magee in the build-up to the 1960 Rome Olympics:
Athletes new to the program began at a modest mileages and increased volume over time. Some adapted quickly, others required years, and some never reached the 100-mile weeks. Lydiard coached them with equal care, whether they became Olympic champions or lifelong club runners, working to help each runner reach their own potential.
Another major innovation in Lydiard’s system addressed how athletes controlled training intensity. Without heart-rate monitors, he defined training intensity by perceived effort and breathing patterns. These effort levels align closely with modern rowing training zones:
Athletes were encouraged to listen closely to their bodies and adjust distances, repetitions, or effort levels as needed. Breathing served and still serves as a reliable proxy for training intensity.

Lydiard did not believe in traditional weight training. Instead, he used hill running to develop leg strength, ankle flexibility, and efficient running mechanics. In rowing terms, this phase is comparable to power strokes, technical drills, and workouts using multiple stroke rates. While modern rowing programs frequently include weight training to improve leg strength and maximal power, Lydiard achieved similar adaptations through terrain-based resistance.
His hill circuit consisted of a steep half-mile climb with a flat quarter-mile section at both the top and bottom. After a two-mile warmup, athletes sprinted uphill with exaggerated knee lift and powerful toe push-off. At the top, they jogged for recovery, then ran downhill fast but relaxed and under control. At the bottom, the half-mile flat was used for short, sharp sprints such as alternating 50- and 220-yard efforts.
Originally, the workout session consisted of four repeats of the hill loop. Monday through Saturday, followed by the 22mile Waiatarua run on Sunday, for a total of six weeks. In later years, Lydiard reduced the number of hill sessions to three per week. For the other three days, he introduced a new workout which he called the leg speed workout.
The final phase, Race Conditioning, was divided into two five-week blocks. The first emphasized repetition work, sprint training, and steady runs. The second replaced repetitions with sharpening sprints and time trials. The goal was to progressively blend speed and endurance while sharpening race-specific skills and timing. Together, these two blocks were designed to progressively blend speed and endurance while sharpening race‑specific skills and timing.
To make sense of the race‑conditioning schedules, it helps to understand how Lydiard defined the key workouts used during this phase.
Key workout concepts included:
The schedule below illustrates how this phase was structured:
| First Five Weeks: | Second Five Weeks: | |
| Monday | 2 miles | 3 miles of fifty-yard dashes |
| Tuesday | Twenty 220s at ¾ effort | Fartlek 1 hour |
| Wednesday | Sprint training and race 100/200 yards | Time trial ½ race distance |
| Thursday | Three miles at ½ effort | Sprint training |
| Friday | Sprint training and starting practice | Leg speed workout |
| Saturday | Twenty 440s at ¼ effort | Time trial or development Race |
| Sunday | 2 hours easy | 1 hour easy |
Taken together, Lydiard’s ideas predate heartrate monitors, power meters, and lactate testing, yet they map remarkably well onto how we now understand endurance training in rowing. His system explains why high-volume aerobic work matters, when strength and speed should be added, and how to peak without burning out, problems that masters’ rowers wrestle with constantly.
More than six decades later, the principles behind Lydiard’s success, patience, aerobic mastery, and precise timing, remain deeply relevant to rowing performance at every level.
David Finniff
I wrote to David to ask what the Fartlek sessions he mentioned entailed.
The fartlek sessions were not structured. Here is some background. Major high school, college and the AAU cross country races in Pittsburgh were run on trails in a very hilly city park called Schenley Park. There were 3 major courses: a 2 mile. a 3 mile and a 6 mile course. In the late 70's the courses were converted to metric distances: 3K, 5K and 10K. My understanding now is the city in the last 15 years or so has made major changes the park and the courses I ran on have been re-routed within the park. I probably would not recognize the park today as I have been living in Colorado for almost 30 years now and have gone back to Pittsburgh only about 4 times.
For my fartlek sessions I ran 2 laps of the 6 mile or 10K courses. I would run the first 2 miles for warmup. My standard warmup procedure whether on the track or the cross country course was to start out at a jog ( about 8 min/mile) and gradually build the pace so that at the end of the 2 miles I was running sub-five minute per mile pace. As for the fartlek sessions. I would randomly run parts of the trail at different speeds for different durations and then run at a comparable zone 2 or UT2 pace until I recovered. Some of the hills I would sprint hard up them and recover on others. It was the same for the downhills and the flat stretches. Running the shorter hills was comparable to Sam's 30 sec max intervals while the downhill sprints were comparable to the 60 sec max intensity intervals. Longer intervals were similar to TR pace intervals.
I hope this helps clarify the fartlek sessions. Let me know if there are any other training methods that might need further explanation.
We've been thinking about road safety. Specifically, water safety. Because let's be honest, if the road rules applied to rowing, half the crews on the river would have had their licences revoked years ago.
So we are delighted to announce that, effective today, Faster Masters Rowing is introducing the Official Masters Rowing Driver's Licence. All masters rowers must pass the following competencies before being permitted on the water unsupervised.
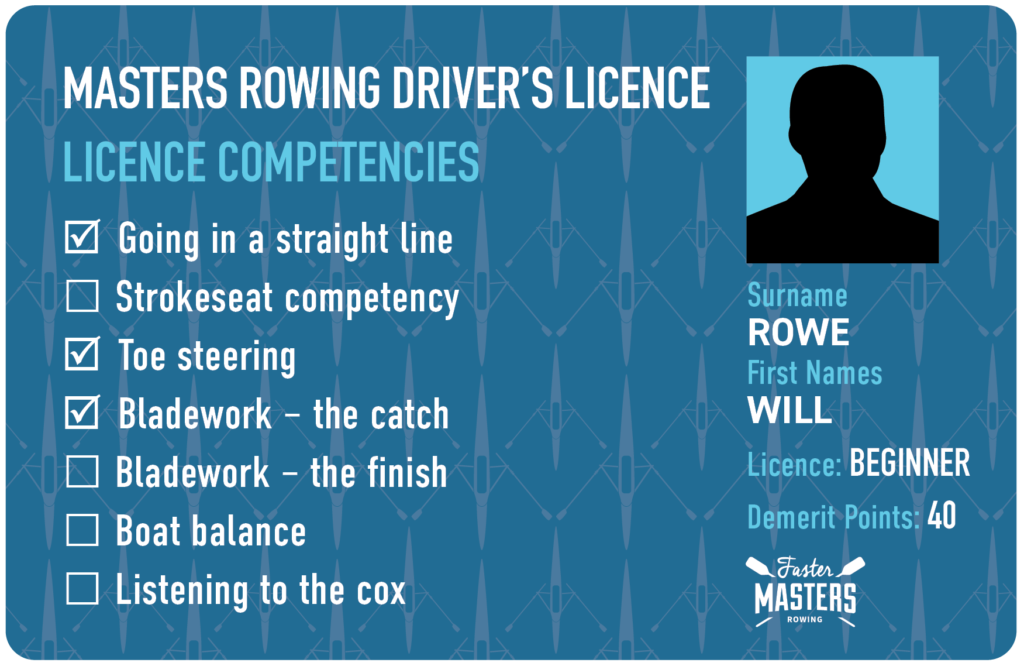
Accumulate 50 demerit points and your licence is suspended. You will be required to row with the juniors until further notice.
| Infraction | Points |
|---|---|
| Crabbing at the start of a race | 3 |
| Over-steering | 4 |
| Stopping in the middle of practice to "check something" | 2 |
| Blaming the equipment / the rig / the weather | 2 |
| Rowing on after a crab and pretending it didn't happen | 1 |
| Correcting the coach or the cox | 2 |
| Being the last crew back when the coach is freezing on the launch | 1 |
| Capsizing and blaming your partner | 5 |
Applications open today. Testing centres will be at your home club. Examiners will be wearing high-viz and carrying clipboards. Happy April Fools' Day from all of us at Faster Masters Rowing.
Licenses are valid for four years or until your next crab, whichever comes first.
Yes, stop immediately if you have sharp, localised pain that worsens during rowing or persists 24+ hours after. Pain is your body signalling tissue damage. "Rowing through it" risks turning a minor issue into major injuries requiring months off.
Stop, assess, fix the root cause, then return gradually with medical clearance. Ideally find a medic who understands rowing.
Sharp, Localised Pain:
Pain That Persists:
Mechanical Pain:
Warning: Continuing to row with these symptoms risks turning a 2-week issue into a 2-3 month forced layoff.
General Muscle Soreness:
Post-Hard-Session Fatigue:
Mild Technical Discomfort:

1. Stop the activity causing pain
2. RICE Protocol
3. Document your symptoms
4. Consider anti-inflammatories
If improving:
If not improving or worsening:
Likely causes:
What to do:
Return protocol:
Full guide: Why does my lower back hurt after rowing?
Likely causes:
What to do:
Return protocol:
Full guide: How to prevent rib stress fractures
Likely causes:
What to do:
Return protocol:

The logic: "I don't want to lose fitness" or "It's not that bad"
The reality: Minor injuries become major with continued loading. You'll lose more fitness from forced 2-3 month layoffs than from 2-week strategic rest.
Maths:
Smart choice: Take the 2 weeks now.
The trap: Normalising pain that shouldn't be there
The truth: Pain is your body's warning system. "A little" often becomes "a lot" with a single bad stroke or hard session.
Guidelines:
The trap: Rowing injured to make a race, making injury worse, missing even more races
Smart approach:
Reality check: You will NOT race well injured. You'll race poorly AND make the injury worse.
Week 1-2 post-injury:
Week 3-4:
Week 5-6:
Week 7+:
Don't rush this progression. Recurrence rates are high if return too quickly.
Technical faults:
Training errors:
Strength deficits:
Regular maintenance:
Body awareness:
Don't self-treat serious injuries. Proper diagnosis and treatment prevent chronic issues.
Our Technical Masterclass teaches injury-preventing mechanics:
Train smart, stay healthy, race consistently.
Join our newsletter for injury prevention strategies and technique insights.
Dr Malcolm Howard, Canadian eight Beijing 2008 “People say it was always so easy for you, so straightforward. But it’s always been about the work. Rowing, by its nature, is a beautiful sport because you get out of it exactly what you put in. The harder I worked at rowing the more success I had.”
Timestamps
00:45 Why your brain is working against you
Many masters rowers are putting in less than they think believing in a ceiling which is not real. And limited by a brain that pulls the 'alarm cord' long before you've reached your limit.
Are you paying what rowing actually costs? This is a way of measuring work and exposes pretend work. If you train by feel (Rate of Perceived Effort RPE) but feel and reality diverge with age. RPE rises as recovery slows. When you bring tiredness into training sessions your RPE can be higher even if your work output is lower.
The three columns - What you planned to do this workout, what you actually did, honest quality rating (1-5 range). Average the scores at the end of each week. Map the gap between what you intended and your execution. Write it down and bring honesty to your training.
Some masters may be leaving more on the table than you think. A limiting belief is that your effort is limited by age. This kicks in before your actual physical limit occurs - mind working separately from the body. Test yourself by picking one thing on your training plan that you dislike and so avoid doing. Am I avoiding this because my body can't do it or because I don't want to find out what it reveals about me? Masters have more choice and may take more recovery between workouts than pro athletes. Do that one session which you've been avoiding next week and notice if the ceiling is your body or your mind.
The science behind your brain limiting you in an effort to protect you. Your brain lies in order to protect you - so renegotiate with your brain. Brains are survival machines and send a STOP signal before you reach your actual limit. It's conserving resources and energy reserves in case you need it. The Central Governor Theory by Tim Noakes - brain limiting your output based on predicted cost not actual capacity. When you expose your body once to a hard effort - your brain re-anchors what hard feels like. Next time you do it the alarm goes off later. Perceived difficulty and the urge to stop reduces on the second exposure to the same stimulus. The brain's prediction model adapts. This is the physiological underpinning of Malcolm Howard's quote. The work doesn't just build the engine, it teaches the brain what your engine can do. Faster Masters Rowing training programs include workout repeats in order to help you use the repeated bout effect in your training.
The ledger shows what you're actually putting in; the ceiling test shows what's still available; the repeated bout effect shows why doing it once is enough to retrain your brain.
Listen to audio version
Remember the days of having drinking straws gummed to the side of the boat to mark your catch angle? Well it's impossible to buy plastic drinking straws now - so we are using cable ties instead.
What I found from having a marked catch angle was that despite being an experienced rower, I am actually very variable in my forward angle. I found that when I get the body set correctly off the finish, I achieve the catch angle - when I do not, I am 2-4 cm short of touching the wand.
The perpendicular is the reference line — it runs at exactly 90° to the boat's centreline through the pin. Everything is measured from here.
Catch angle is how far the blade enters forward of the perpendicular. A larger catch angle means the athlete is reaching further toward the bow at the catch — more arc, but harder to accelerate through.
Finish angle is how far the blade extracts behind the perpendicular. Finish angles are almost always smaller than catch angles.
Total arc (catch + finish) is the key number, typically 75–90° for most sweep and sculling setups.
The values (47° catch / 33° finish) are close to typical Masters sweep targets. These are dependent on athlete height, flexibility and technique level.

This [not to scale] diagram show a sculling boat and the angles. Click it to see an animation of the oars moving through the arcs.
The U-Row team has designed a neat tool to help you measure the catch and finish angles on sweep rowing shells - it sits on top of the oarlock pin (there's a tube to keep it centered). Then using a string line, you measure 90 degrees square off to get the tool aligned, and then take the string to the catch, where the angles are already marked on the circle. This makes it easy to define the catch angle.
Once you have the string in place at your preferred angle, put the U-Sweep wand mount onto the sax board (it wedges on easily); move the vertical black wand to gently touch the orange string line. Mark the position so it can easily be removed and repositioned.
The wand mounts press over the sax board of most modern boats - and can be removed after each practice. The black wand is flexible and your goal is to touch it with the leading edge of your sweep oar handle each catch. Oh, and the wand stores inside the long arm - saving space and less risk of damage.
It took us about 30 minutes to set the angles on an eight. Then each practice, the athletes can align their wand with the marks after it's on the water.
Buy a kit for a pair, four or eight - comes with one circular sweep tool and one wand per seat.
Join our community and get our exclusive Faster Masters Rowing Magazine, packed with tips, techniques, and inspiring stories. Includes four new articles monthly.