Many coaches started doing rowing video analysis markup with a tool called Coaches Eye - sadly it was withdrawn September 2022 and so we have all been on the hunt for a replacement.
We have found some for you to consider.
This is free on the Apple Store. You can import your videos into it, run at slow speeds down to 1/8 speed, annotate, measure angles etc. Also offers In-App purchases for distributing video to athletes.
You can upload two videos side-by-side and compare them.
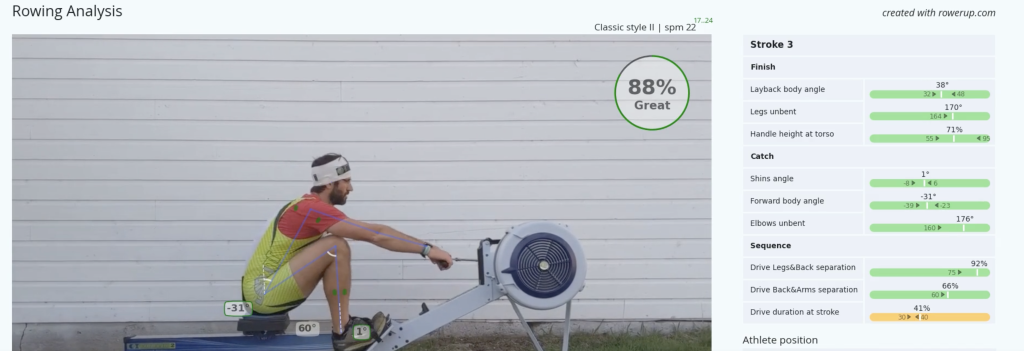
This is a tool which does physiological measurements for you - it scans your video of rowers and tells you angles between the limbs and the stroke length and sequencing. The process is called "telestration".
Clearly useful for tracking progress as your crews adapt to a particular style of rowing. Downsides, it's THEIR analysis, not yours and it is only numbers. The coach needs to first have a good idea of what numbers they want. The app is free at the moment as it's in beta.
This is the closest alternative to Coaches Eye - annotate your video with lines, angles and comments. It also offers semi-automated angle tracking (like Rowerup). Most usefully it allows side by side comparison of two videos which you can synch e.g. to the catch of one stroke.
The app is free and the creator asks for optional Patreon subscription support.
This is an app and designed to offer simple annotation and most usefully "skeleton mapping" - a stick man drawing tool. So you can automatically see where the rower's limbs are and how they move. That saves a lot of time drawing lines! It has slow motion replay, and side by side options and also allows text messaging to your athletes from inside the app.
The coach version is only available in the Apple app Store for iPad users. The Athlete version is in the Google Play store as well. The coach version includes in-app purchases.
This article was first published in the Masters Rowing Magazine in May 2023.
Discover how to adjust your blade parallels when rowing in a mixed crew to get the oar arcs as similar as possible.
Timestamps
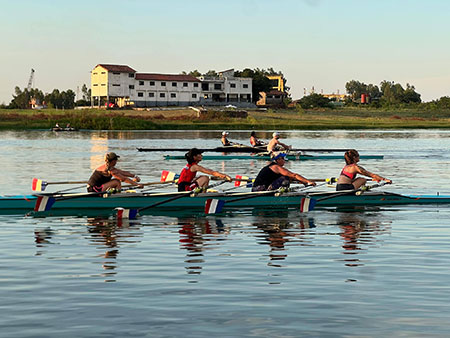
Set up the boat for a comfortable row - ideally with all the oars moving through the same angles. Know the dimensions of the athletes - how tall are you relative to your wingspan (fingertip to fingertip).
04:00 We do not have to be rigged identically in the boat. Start with the basics - ensure your set up in the boat is good. Start with getting the finishes parallel. Set up your back seat wheel to the same distance behind the face of the work. 58-62 cm is a normal range in sweep. In sculling, it's done by getting the gap between your handles the same at the finish. This assumes you are using oars / sculls which are the same length and inboard.
Meeting in the middle is worthwhile - tall people row a little shorter and shorter people row a little longer. Use video to assess how you are rowing - record this at firm pressure to get the best insight.
Want easy live streams like this? Instant broadcasts to Facebook, YouTube, LinkedIn. Faster Masters uses StreamYard: https://streamyard.com/pal/d/5694205242376192
Get better at extracting the oar without being splashy and frantic. And why your elbow position is of critical importance.
Timestamps
The goal is to get the oar out of the water in a smooth movement and as efficiently as possible. Start with the correct set up at the finish. Your handle end should be in line with the side of your rib cage.
Pause at the finish with the oar flat on the surface of the water. This helps you check the height of your handle and your outside hand should be brushing your shirt. The handle height is the same as when your oar is under the water a the end of the power phase. Check you are drawing your finish to the right position.
Outside hand drawing through with pressure and controlling the height of the handle; the inside hand is squaring and feathering. Outside hand pushes down to extract the oar from the water and then the inside hand turns the oar to feather it. Practice this slow motion or in fours/pairs.
Wide grip (inside hand down the loom) helps to teach you which hand controls the handle. By isolating your inside hand closer to the oarlock pivot, it makes it harder to control the handle height with that hand. Control each hand by altering the grip tightness on the handle - loosen the grip alternately to keep the focus (inside/outside).
If your elbow is lower than your wrist it's hard to push down on the handle with the outside hand. Progressively move your hands back to a normal grip starting from wide grip.
There's a tendency for may athletes to have too much control with the inside hand. You're also unlikely to be only feathering with the one hand.
Keep pressure through to the end of the stroke, holding your oar under the water 1 cm longer.
Work your inside hand at the very end of the power phase - the outside hand loses effective power at the end of the power phase because it's at an increasingly obtuse angle to the oar handle. Whereas the inside hand can stay at 90 degrees to the handle. Give an extra pull with the inside hand at the end of the stroke.
Stationary stability drill is a free video joining bonus in our Coach Mastermind Group as a joining bonus. Get yours here
And to your hand grip tightness while rowing. Ensure you aren't dominating with the wrong hand.
Further Resources
I saw this post online from a respected coach and we discussed it in the Coach Mastermind group discussion.
What do you see in the photo? Compare stroke and 7 seat athletes. Think about technique, posture, power creation, muscle recruitment, likely blade spoon position.
[DON'T scroll down until you've thought about your answer.]
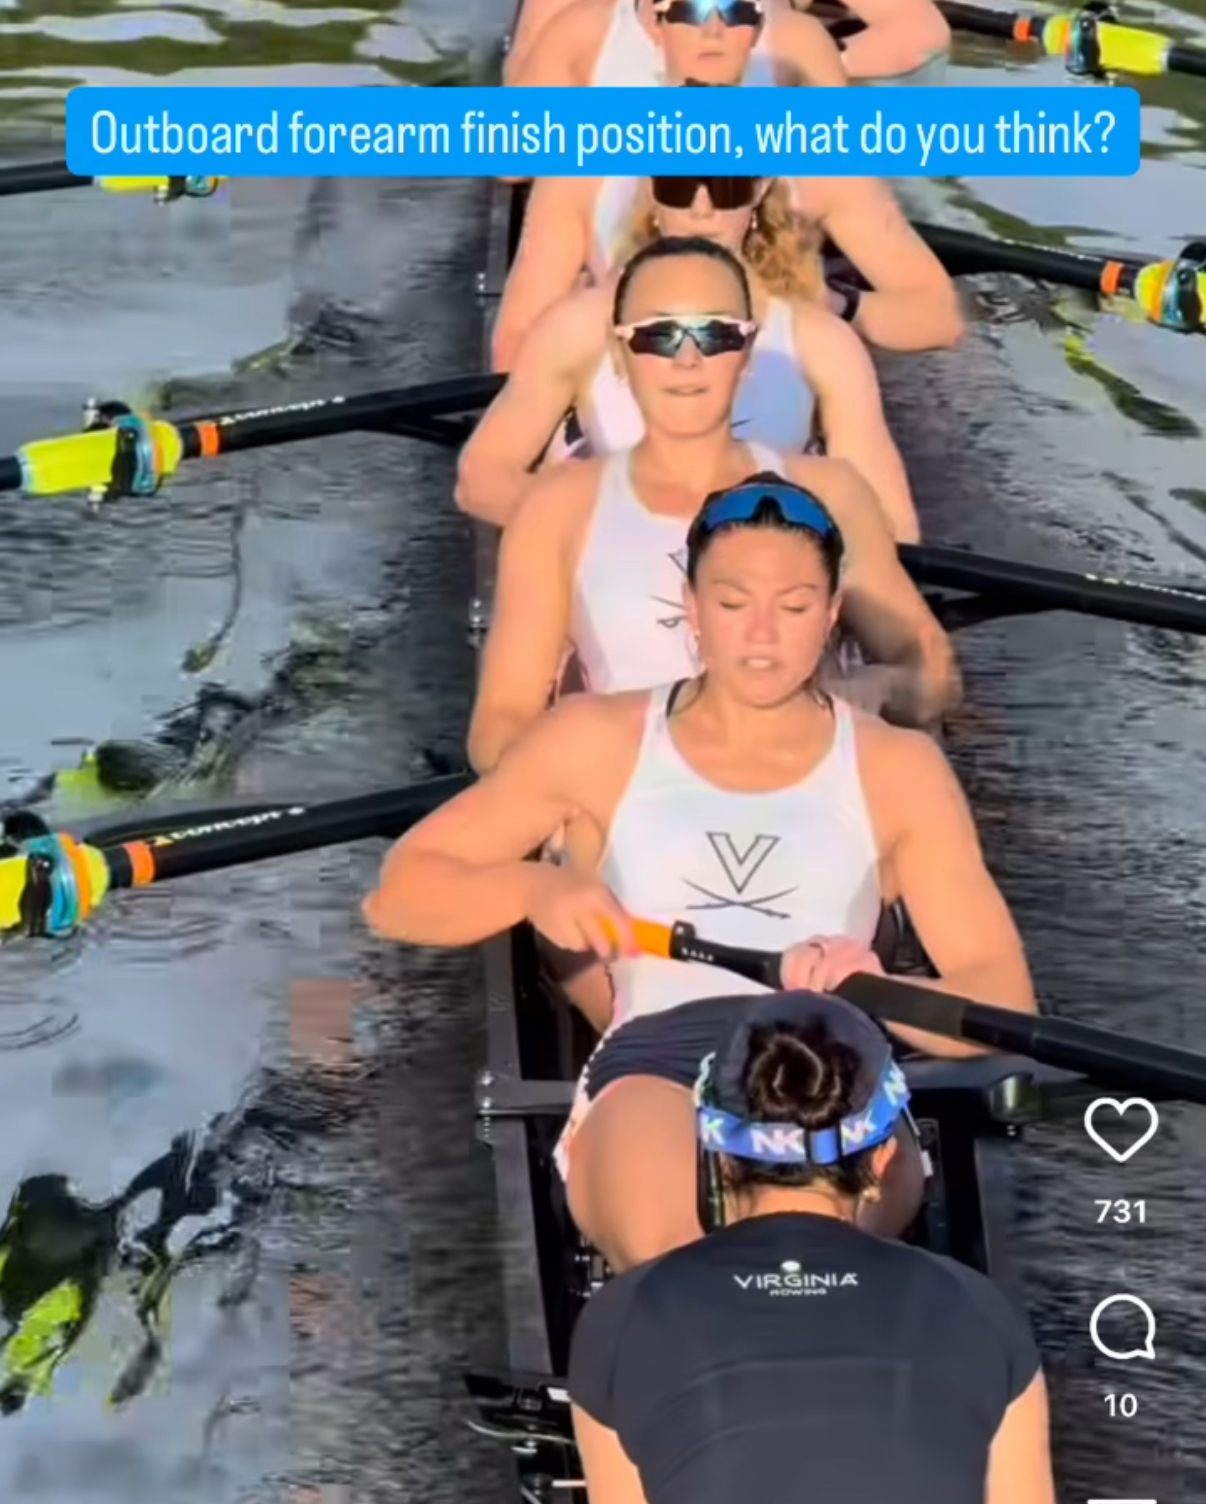
My views and what I can see (training your coach's eye to spot these differences is an important part of advancing your coaching practice).
I see the stroke has her right elbow pointing sideways out of the boat and her right hand rests on top of the oar handle with two fingers lightly holding the rubber grip and the wrist is flat; she leans slightly towards her rigger (shoulders aren't level) and her inside arm is feathering the oar and the elbow is lower than the oar shaft. There's a lot of tension in her left forearm.
The 7 seat has her left elbow pointing behind her towards the girl sitting behind, the wrist is flat; she also leans a little towards her rigger and her inside elbow is pointing a little out the side of the boat. We cannot see her right wrist or oar handle grip.
If stroke is controlling her oar handle height with her inside hand (I can see more tension compared to her outside hand) then she likely will be less skilful placing the oar at the catch. It's harder to control the push down on the oar handle if your elbow is below your wrist or the oar handle/shaft. Similarly trying to place the catch using the inside hand is less accurate (as your inside hand is closer to the oar shaft fulcrum).
If 7 has her outside elbow pointing behind her she's likely continuing the arm draw using her lats as well as bicep/tricep. She looks like she isn't feathering with her outside hand.
Both athletes may be able to get more power right at the end of the drive phase if they used their inside hand to pull the very last bit of the stroke. This is because as the oar handle comes around the arc, the outside arm becomes increasingly ineffective, while the inside arm can have a 90 degree angle to the handle which is efficient for pulling. Note this is a very small part of the power phase.
Could the boat go faster if these technical points were changed? How fast can athletes change their technique? When fatigued, how quickly will athletes revert to "poor" technique? Have you got time to fix these things before a big regatta? Is this a coaching style you want to encourage? How much crew symmetry do you desire in your crews?
All of this is in service to identifying inconsistencies in your crew and for you to coach them towards identical positions while activating the same muscles to make their rowing stroke power.
Masters rowing is about rowing with adaptations.
Timestamps:
00:45 Grant Faulkner quote: The speed the clock moves forwards and the things it takes away. Masters learn to enjoy age and the things we have to adjust for our rowing.
Nobody told me it was going to be like this!
Strength and Mobility are the main things you will notice first. Strength diminishes differently between men and women 50s versus 60s. Your 60s is a 'hold steady' decade. Read article. Use the Facebook group to post questions and get answers from people who have the same issues.
Range of movement in joints is important - pelvic mobility in the hips to get into the rowing stroke positions. Flexibility is also key.
Programs page has FREE STUFF including How to test your functional movement and strengthening exercises. David Frost's webinar on Functional Strength and Movement is a deeper dive into exercises for body strengthening for daily life - essential for older women who find it hard to lift a boat. If athletes can't get into the right positions for rowing it's difficult to teach them.
Adjustments to take account of mobility issues. Adapting Rowing Rigging For Masters Physiology article Try to maintain your technique and range of motion as you age. Adjust rigging to accommodate physical limitations - some are easy, medium and hard - they take tools and more time to set up.
We can still always improve our technique as we age. Despite losing strength, masters rowers can always be more skilful at the catch, get the blade in without slip, get a full leg drive, recruit extra muscles to add to power delivery. Technique has no regard for age - you can improve at all ages.
What is the next horizon for you? Most of us delay making changes - if you are losing strength, you should be shortening your oars (Volker Nolte's Rigging Webinar has charts for oar designs, Men and Women). Most masters row on oars which are too long for their strength and capability.
This webinar includes
Want easy live streams like this? Instant broadcasts to Facebook, YouTube, LinkedIn. Faster Masters uses StreamYard: https://streamyard.com/pal/d/5694205242376192
The three stages of masters rowing and a checklist of the skills learned in each stage. When learning to row you move up through experience and grades.
checklist
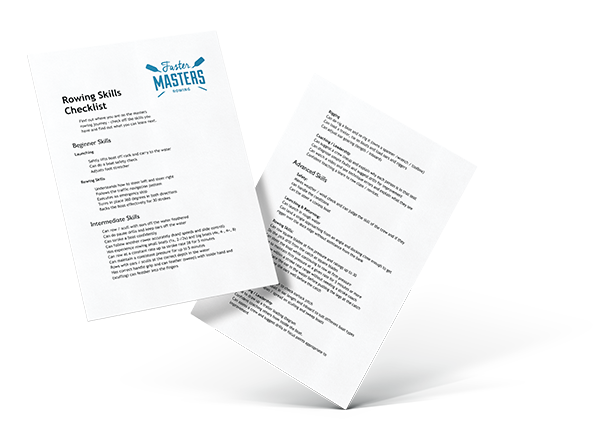
This is a summary checklist - you can get a more detailed one if you join the
Coach Mastermind Group - customise this to suit your waterway and local safety practices.
Watch our podcast episode on the ladder of learning — we walk through how rowers progress from beginner to advanced, what holds people back at each stage, and how to know when you're ready to move on. It's a practical listen whether you're coaching yourself or others.
Join the Faster Masters Rowing newsletter for regular technique advice, training ideas and insights designed specifically for masters rowers. Thousands of rowers aged 40+ read it every week.
Sign up free →The free checklist you've just downloaded is a summary. The full Rowing Skills Checklist — available from the Coach Mastermind Group — breaks every stage down in detail. It's US$10 and worth every cent.
Get the full checklist →Meet Jonathan Drake who teaches rowing using Alexander Technique methods.
01:00 Jonathan is an expert in rowing, Tai Chi and the Alexander Technique. His awareness of his co-ordination issues comes from being an Alexander teacher. Insights into how adults learn. His book is Rowing from the inside out: The art of indoor rowing with on the water in mind.
What is it like to scull on the water while you're learning to row indoors?
Understand how rowing is "in your head" and how to connect this to what your body does. Ingrained movement habits are hard to change especially as you get older. Move more lightly, freely and less movements creating tension.
Pulling your neck forwards and downwards creates tension in the rowing stroke. Feel how the dynamic opposition of one part of the body connects or separates from another part. Using your body changes through the rowing stroke. In the power phase the spine lengthens and changes at the finish before lengthening again on the recovery. The perspective is novel - indoor and outdoor rowing combined with Alexander Technique and Tai Chi. Learn from the inside rather than copying someone else from the outside.
10:00 There's a sequence in the feet - pushing off the balls of your feet causes calves to tighten and then after your heels are down and the stroke finishes, people lift the balls of their feet again. That's why gym rowers strap in their feet tightly. The basic dynamic is through the feet - the inside of your heels means you access the whole of your foot arch, this gives you the power you need to perform rowing while sitting dynamically.
It gives you more awareness of when you're using more effort than necessary. Engage in the journey yourself because you cannot teach what you do not know. You can get results without all the effort.
Encourage your athletes not to strap in your feet from the beginning. How to hold the handle without gripping (creates tight wrists and shoulders). When you understand about how to control the blades in the water - feather into your fingers - you can use your fingers on the indoor rower in the same way.
The key to coordination is the relationship between the neck, the head and the back. If your neck stiffens it creates spinal compression and tension. Our habits feel comfortable. Come to a state of quiet to help the body to organise itself. Learn to do less in order to achieve more. At the start of the drive the connection comes from the feet, then moves into the legs / hips / back and into the arms. As the recovery begins the pelvis takes the energy into the arms and body.
Ed Coode, rowed for Great Britain in Athens 2004 - he was taught AT.
20:00 The book is very clear on how you teach. When Jonathan is on the rowing machine he views each stroke as a potentially new experience. Use them as an opportunity to be constantly refining and improving your movement patterns. It's never too late to make improvements. The book has links to video clips on YouTube to show what to do.
Contact Jonathan [email protected] www.everydayfitness.co.uk
Want easy live streams like this? Instant broadcasts to Facebook, YouTube, LinkedIn. Faster Masters uses StreamYard: https://streamyard.com/pal/d/5694205242376192
Why the blade pathway from crossover to catch is so different between the left and right hands. If you aren't going straight, three things to check.
01:00 What generally causes difficulties?
Beginner errors are straightforward to work out if these are affecting you.
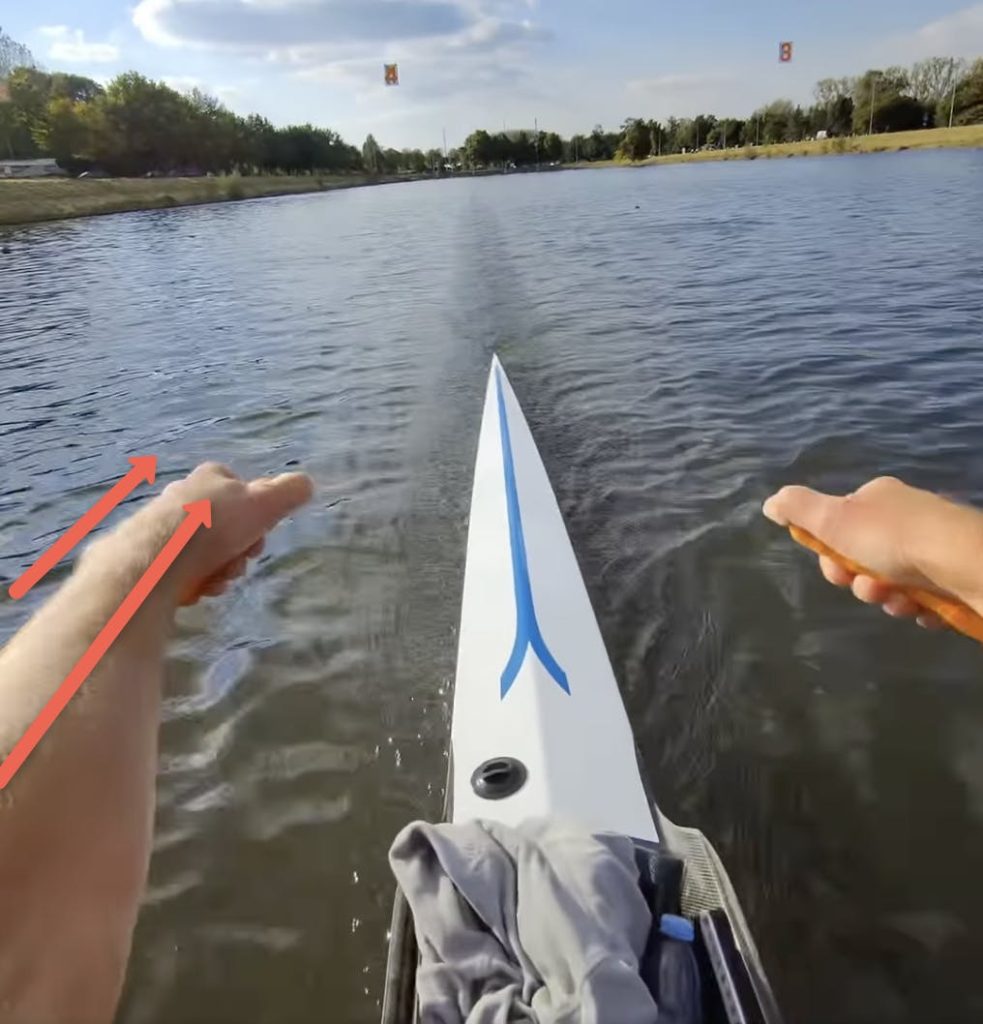
Look from your stern to the horizon and line up your stern with a fixed point (house, power pole, tree) and watch the wake off your stern. You can see if the vee of the wake is symmetrical.
04:30 Blade extraction - are the blades coming out at the same time and are you pressing down symmetrically? If one blade drags that affects the boat course.
05:30 Blade crossover - from extraction to handle crossover it's important the boat is level. The rig is left higher than the right - your handle heights have to reflect the difference in oarlock height. Ensure your hands are "nested" close together.
08:00 Blade catch - the handles have to be symmetrical around a similar arc from the oarlock so the tips of the blades are the same distance from the side of the boat.
The right hand has to move a greater distance from crossover to the catch than the left hand. It's probably 2 cm greater distance. Practice the fine motor skills to make subtle adjustments to the handles using pontoon floats on a single scull. Your arms have to go out to the same distance at the catch (not the same handle height). Listen to the sound of the oars going into the water - you can hear if one oar goes in before the other.
Want easy live streams like this? Instant broadcasts to Facebook, YouTube, LinkedIn. Faster Masters uses StreamYard: https://streamyard.com/pal/d/5694205242376192
Are you sitting comfortably? A rowing boat seat is designed to enable you to tilt your pelvis forwards and backwards during the rowing stroke. The holes in the seat top enable you to stay sitting in one place and not slide off during the stroke.
Find your "sit bones" and work out if you have them moving correctly as you row.
Watch Marlene Royle explain how to work out if you are sitting in a neutral position, how to check your pelvic angle is correct when you lean back and forwards and two stretches for pelvic mobility.
Watch Marlene Royle explain how to work out if you are sitting in a neutral position, how to check your pelvic angle is correct when you lean back and forwards and two stretches for pelvic mobility.
Inspired by an extensive discussion on the Masters Rowing International Facebook group, this article summarises the issue and the advice shared by group members.
If you’ve been sculling for a while, you might have experienced the painful frustration of scraped or “bloody” knuckles. It’s quite common, but it’s not one you have to live with. By making a few key adjustments to your technique, you can keep your hands intact and enjoy smoother, more efficient rowing.
In this post, we’ll explore why scraped knuckles happen and how to prevent them. Whether you’re an intermediate master rower looking to refine your sculling or simply want to row pain-free, these tips give you some things to try.
The root cause of scraped knuckles lies in how your hands and the oar handles interact during the rowing stroke, both on the recovery and in the power phase. As you bring the handles toward your body, they overlap at the crossover point. This is the place where the fingernails of one hand can pull over the skin of your other hand.
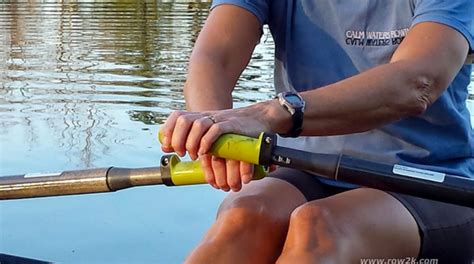
When sculling, you can choose a couple of different techniques to reduce the likelihood of hazard at the overlap. My favoured technique is to scull with the left hand above and slightly in front of the right hand, so the knuckles of your right hand "nest" into the base of your palm of the left hand - the fleshy part at the bottom of your thumb. This "left-over-right" technique applies throughout the stroke but is most obvious when you handles go through cross-over.
This method is facilitated by the boat rig whereby the left oarlock is rigged 10mm (1 centimeter) higher than the right oarlock. It relies on you being able to scull with the left hand / arm always above the right hand / arm, throughout the stroke, from catch to finish.
In this still taken from a video, you can see the sculler's left hand is higher than his right hand at the catch. He continues the stroke with the left always higher than the right through to the finish. If I'm being picky, he sculls the power phase left in front of right and the recovery phase with hands stacked one above the other. But this is a minor point of refinement. His boat runs level and he has not got obvious scratches on his knuckles!
Alternative techniques include sculling with one hand directly above the other, sculling with a large vertical gap between your hands at the crossover.
Other contributing factors include:
Scraped knuckles are an annoyance, but they’re also a badge of honour - mostly only scullers get them, not sweep rowers!
By focusing on hand staggering, grip relaxation, and elbow movement, you can row more comfortably and efficiently. As a mid-life master rower, these adjustments not only prevent knuckle scarring but also enhance your overall enjoyment of the sport.
Take the time to refine your technique, and your knuckles will thank you!
Join our community and get our exclusive Faster Masters Rowing Magazine, packed with tips, techniques, and inspiring stories. Includes four new articles monthly.